Wednesday, February 29, 2012

Four Leaf Clover - China Glaze

Todays polish is a right little bugger of a polish! I say that not because of how it looks or how it applied or anything like that, but because it was IMPOSSIBLE to capture the colour! So I apologise in advance for the very peculiar lighting used to get close to what this beauty actually looks like...

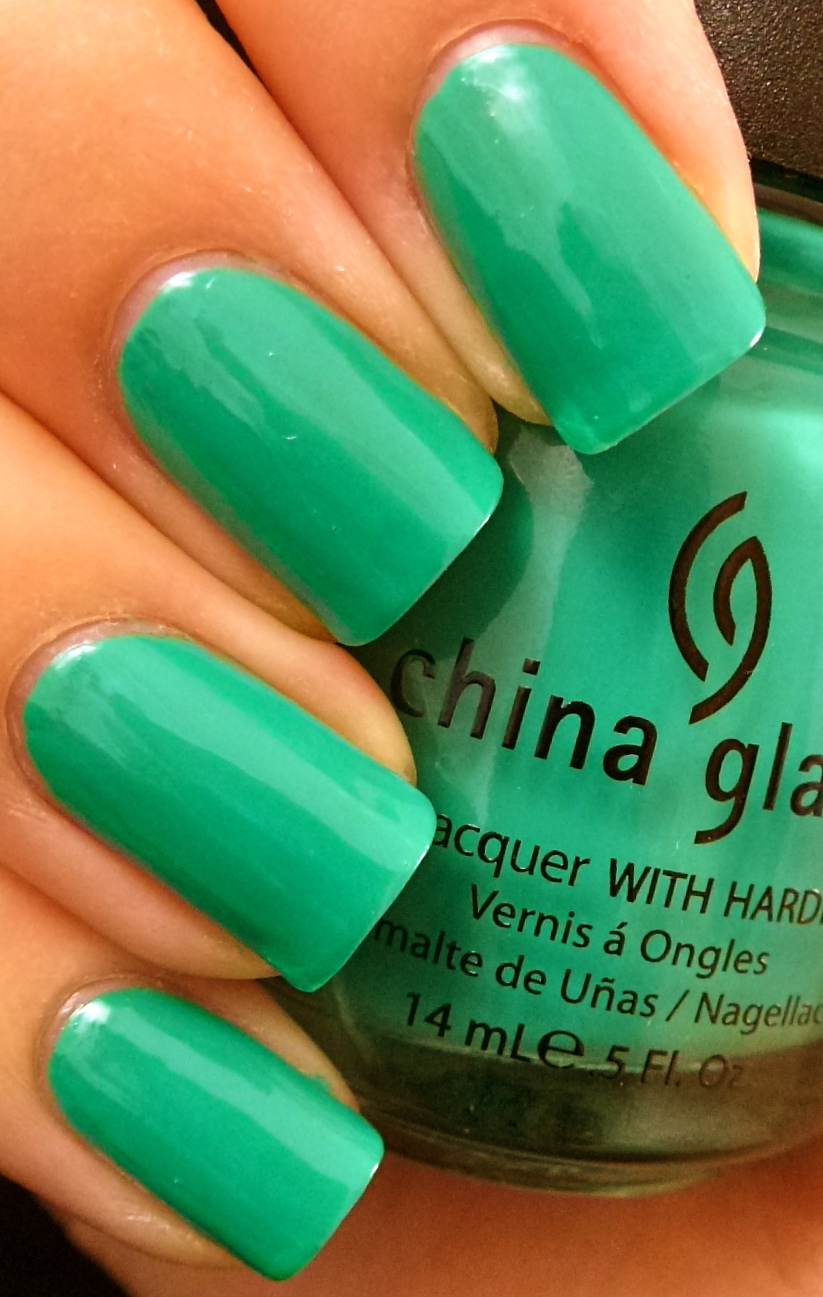
This here is China Glaze's 'Four Leaf Clover'...


Excuse the super lobster-y skin but the polish here does look similar to the colour of 'Four Leaf Clover'. It's a really happy bright green-y, blue-y, jade-y colour. It's difficult to put my finger on any single colour to describe this polish.


This photo displays just how green this polish truly is. It's so saturated and bright and summery!


So just for the sake of curiosity, I've included a representation of how 99% of my photos of 'Four Leaf Clover' turned out. Yes this is the same polish! It certainly is a very blue leaning green but it doesn't look anything like the teal colour of this photo. There is a little bit of truth to this photo in that it does show you how gorgeously shiny this crème was. Every time I look at this photo I laugh because it really doesn't look like this much at all!


To the formula... This is the first China Glaze polish I've ever actually used! And I was not disappointed. The brush was pretty skinny and i do prefer the wider OPI style brushes but it didn't actually cause any difficulty. The polish itself glided onto the nail with minimum effort. I did use three coats for blog photo purposes but 2 would be perfectly sufficient. Overall this colour is a big winner if you ask me. It's pure happiness on my nails :) Also, as to this being my first China Glaze experience, I have since purchased 'Sweet Hook' from the recent 'Electropop' collection and am being tempted by several more, so stay tuned for that...


For my kiwi readers, I know that China Glaze is not particularly accessible but Candy Girl have a great range, which is where I got 'Four Leaf Clover' (and 'Sweet Hook'). China Glaze polishes are $13.95 from Candy Girl and $4.40 per order for postage.

Sunday, February 26, 2012

How to fix a ripped nail

As the title suggests... I broke a nail! Well it started to break and so I thought I may as well take this opportunity to show you what you can do if this happens to you. My nail started to rip quite far down so I wasn't so happy to just snip it off...

First off I'd just like to say that I learnt this fix-it method from a great video on youtube. There are heaps of other tutorial videos for fixing a broken nail all over the place.

What you'll need is...
  • a teabag
  • scissors
  • rubbing alcohol/acetone
  • some nail glue
  • glad wrap (plastic wrap)
  • a buffer


Please excuse my slightly stained nails - who would have thought I would be showing you my naked nails so soon!
For this method, first you need to empty the tea out of the teabag and cut a strip that's about the width of the nail that needs fixing.


Cut one end of the strip into a rounded shape to fit the shape of your cuticle


Give your nail a wipe with some rubbing alcohol (or acetone) to get rid of any oil or residue. Paint on some nail glue - it's best to use a glue with a brush because it's just a little easier to spread and control. I found this glue at a chemist. I cant remember the price of it but it wasn't expensive. Make sure that you have plenty of glue on the part of the nail that's ripped.


Quickly stick the teabag onto the nail and make sure it's covering the tear in the nail well. Be careful that you don't stick the teabag too close to the cuticle area or you will be able to see it peeking out from your nail polish. Grab some Glad wrap and smooth the teabag out on the nail. Try to get rid of any bubbles or ridges while using the Glad wrap then dispose of it. Paint one more layer of glue on top of the teabag and leave it to dry.


Once the glue is completely dry, cut the excess length off as close to the nail as possible making sure you don't cut the nail. Then, using the roughest side of a buffer, buff the edge of the nail so that it gives a smooth end. Also buff the surface of the nail so that it is nice and smooth too. Be careful when buffing the nail surface as you don't want to weaken the teabag too much, especially around the rip.


Paint your base coat on and then paint your nails as usual and you'd never know that anything's different :) I know that there are methods out there that mean just putting a strip over the area that is ripped but I find that you can see it under polish. This teabag fix will last for a few changes of polish - up to a week to 10 days maybe. Just make sure when you're changing your nail polish that you use acetone-free remover. If you notice that the rip is starting to come apart then you'll just need to change the teabag sooner. To remove the teabag, use the tinfoil technique that I mentioned at the bottom of this post with an acetone based remover, then repeat this whole method again until the rip has grown right out :)

Hope this has helped!

Thursday, February 23, 2012

Planks A Lot - OPI

Early last year OPI released a 'Pirates Of The Caribbean' themed collection to coincide with the release of the 4th movie 'On Stranger Tides'. At first I wasn't all too excited about this collection as the colours seemed kind of "blah" and I decided the only one I wanted was 'Mermaid's Tears'. Well it turns out that I ended up with all of the crèmes in the collection EXCEPT 'Mermaid's Tears' and they are in fact some of my absolute favourite polishes. Anyway enough chit-chat, let me show you one of the polishes from this collection... 'Planks A Lot'...


Planks A Lot, OPI - Pirates Of The Caribbean, swatch
'Planks A Lot' is a lavender-ish colour. I've tried to find, somewhere in my brain, what this colour is like... A little like African Violets maybe and the obvious thought of certain Lavender plants.


Planks A Lot, OPI - Pirates Of The Caribbean, swatch
In indirect ight, this polish shows its ever so slightly bluer side. I love how this is just such a pure purple. The thing that really attracts me to this collection is that all the polishes (not including the shatter) have a certain dusty quality to them. It takes them from being so run-of-the-mill. This polish is no exception although you'll see as I post some of the other polishes from the 'Pirates Of The Caribbean' collection that this dustiness becomes a little more apparent in some of the paler hues.


The formula was great. I used three coats but that was mainly due to the fact that I was photographing it and my camera is not particularly forgiving. At two coats it would be fine for normal wear. As usual I used Essie 'Millionails' as a base coat and I used a-england's 'The Shield' top coat.

Monday, February 20, 2012

Designer... De Better! - OPI

I have been braving the glitters a lot lately, I must say, even though I so desperately dread their removal (thank goodness for the old tin-foil trick!). Today I have a pretty full-on foil for you all from OPI's recent holiday collection - The Muppets Collection. This is 'Designer... De Better!'


Designer... De Better!, OPI, The Muppets Collection
I've never worn a silver foil before because I feel they can be a little obnoxious (plus I feel as though I should be donning a silver foil space suit to match), but 'Designer... De Better!' has a little secret weapon to make it slightly more approachable in the form of its copper particles. In bright full sunlight (see the right side of my nails), this polish becomes mirror like and oh-so-shiny...


Designer... De Better!, OPI, The Muppets Collection
... Head into some shade and the copper/orange colour really takes the stage, giving this the look of an entirely different polish.


Designer... De Better!, OPI, The Muppets Collection

The usual close-up action so you can see those great little copper pieces that mean that I was brave enough to wear (and enjoy wearing) this polish. The main silvery colour of this polish is actually slightly leaning to a creamy silver which seems to add to the appeal.


Absolutely easy application. I did use three coats but I'm not convinced that I actually needed the last one. Removal was, as expected, an absolute bugger. For anyone reading this blog who doesn't know about the tin-foil method of removal... You soak a cotton pad in remover and wrap it around your nail, wrap some tin-foil around the cotton pad and forget about it for a couple of minutes. I actually usually wrap around two or three fingers together with one pad and foil, leaving me with little crab pincers for a while :) After a bit, put a little pressure on your nail through the foil and pull it off the nail (wiping along the nail as it comes off) and ta-da... Most of the polish should have come off in one go. This way of removing glitter polishes is the only reason I dare to use them. One thing... the remover will leave your skin pretty dry after so make sure you give your cuticles some extra TLC. One more tip... If you are doing any clean up of this polish after painting your nails, beware! The glitter will go EVERYWHERE!! I used Essie 'Millionails' as the base coat and again I opted for the slightly thicker Sally Hansen 'Insta-Dri' as the top coat to try to avoid a funny texture.

Friday, February 17, 2012

I Eat Mainely Lobster - OPI

I have for you today some photos of the nail polish I actually wore on Valentine's Day. This is 'I Eat Mainely Lobster' from OPI's 'Touring America' collection released in the second half of 2011 for "fall" in America. By the way, I loved quite a lot of this collection, especially the dark polishes (I'm such a sucker for dark vampy colours), so you're sure to see some more from this collection as the weather gets a little chillier and the darker polishes come out from their summer hibernation.


I Eat Mainely Lobster, OPI, Touring America collection - swatch
'I Eat Mainely Lobster' is a super bright coral shimmer. Yes I said shimmer, though the micro-shimmer in this polish seems to be particularly elusive (especially with a camera pointed at it). Watch, I'll prove there's shimmer in there somewhere.


I Eat Mainely Lobster, OPI, Touring America collection - swatch
See it in the bottle there... So pretty. 'I Eat Mainely Lobster' actually has incredibly fine gold shimmer in it.


I Eat Mainely Lobster, OPI, Touring America collection - swatch
In full bright sunlight it starts to show itself a little just giving the polish a slight luminescent quality. The shimmer doesn't appear as shimmer unless you look close, but rather it just reflects the light beautifully off all parts of the nail.


I Eat Mainely Lobster, OPI, Touring America collection - swatch
In this close-up, you can see just how sparse the shimmer is in this polish. I actually really like that it's so subtle. There are plenty of polishes out there that have a ton of shimmer in them but I don't always feel like wearing something like that. 'I Eat Mainely Lobster' is like the tastefully bejeweled cousin of 'My Chihuahua Bites' :)


I Eat Mainely Lobster, OPI, Touring America collection - swatch

'I Eat Mainely Lobster' doesn't seem to shift colour too much in different lighting. It generally ranges from a slightly more salmon-y colour, to a fairly orange leaning colour (as seen in the full sun photo and in the close-up one). To be honest it looks more salmon-y in full sunlight in real life than orange but that colour did not want to be photographed! This last photo is the closest I got to the correct colour of that particular side of this colour.


Formula wise... 'I Eat Mainely Lobster' applied just the way I have come to expect all OPI polishes to apply... well. I did use three coats because I am having slight issues with my base coat at present and I wanted three coats to forgive my imperfections in my rush to apply this polish and let it dry in the hour I had to get ready for work. I'm sure with a little more care, two coats would have been sufficient! Just while I'm thinking it, whenever I go back to polishing with an OPI polish after not using one for a while, I just realise what a dream the brush is to use! Perfect size for three stroke per nail coats. As for what I was saying about my base coat, I am having trouble with polishes sticking to it and dragging, even when I give it plenty of time to dry. I am currently using Essie 'Millionails' and I want to persevere with it a little longer as it is slowly strengthening my VERY weak and peely nails. I will be going back to something a little more user-friendly as far as the colour coats on top are concerned in a couple of weeks so until then, please bare with my often using more coats than may always be necessary. I used Essie 'Good To Go' as the top coat over 'I Eat Mainely Lobster'.

Tuesday, February 14, 2012

Valentine's Day Mani

Happy Valentine's Day!

So I thought now that I have a blog, I might get into the holiday spirit a bit more and so I decided do a bit of a Valentine's day theme for the weekend.


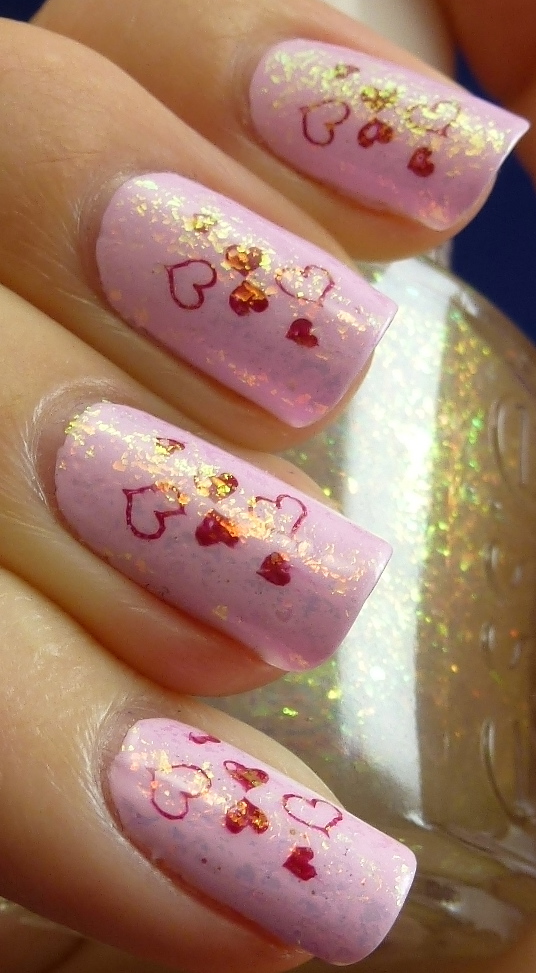
Valentine's mani - OPI Mod About You, Manicurist Of Seville, Essie Shine Of The Times


I started off with 3 coats of OPI's 'Mod About You' from the 2006 brights collection 'Brighter By The Dozen', though 'Mod About You' is now one of OPI's classic Brights By OPI colours.


Mod About You, OPI, swatch
'Mod About You' is a whited-out pink shade that just makes me feel like a walking, talking Barbie! Not necessarily in an entirely bad way either :) It's just fairly in-your-face considering it's a pastel pink.


Mod About You swatch, OPI
In indirect light, 'Mod About You' becomes a little warmer and slightly pinker, which is really pretty.


Mod About You, OPI, Konad m3, Manicurist Of Seville
Next, I stamped hearts using Konad plate m3. I used OPI's 'Manicurist Of Seville' as my stamping polish. I have to say that it's one of my all time favourite polishes and it stamped pretty well! I found it impossible to get the filled in hearts to be actually filled in, as you can see, but I didn't really mind. It reminded me of when I used to draw balloons (or hearts) over all my school books as a kid and I always had to add the little line for where the light hit the balloon (or the heart). I felt like, at this point, my nails looked pretty boring and were clearly missing something... Enter Essie 'Shine Of The Times'...


Mod About You, Manicurist Of Seville, OPI, Konad m3
In direct light (see my ring finger), 'Shine Of The Times' appears to give a slightly purple tinged texture rather than a full rainbow effect. When light hits it from more of an angle (see my index finger), you get the full glory of 'Shine Of the Times' and this is just what I thought was missing from this manicure.


Mod About You, Manicurist Of Seville, OPI, Konad m3         Mod About You, Manicurist Of Seville, OPI, Konad m3
All of the colours seen in 'Shine Of The Times' were so incredibly hard to photograph! The photo on the right is about as good as it gets in showing you the elusive bright red/copper that appears every now and again. To see more of this absolute beauty of a polish, have a look at my previous post of it.


Overall I'm pretty happy with how my Valentine's nails came out. This manicure is so unlike me in so many ways, but I've really enjoyed wearing it. But now to the business side of things... The formula. 'Mod About You' is certainly not my favourite polish to apply, though it's not the worst. You just have to be a little patient and take a little more care than usual. Typical pale polish application - beware of streaks and bald patches. I had to use 3 coats in order to get full opacity and get rid of streaks. The photos of 'Mod about You', on its own and with just the stamps on, are without top coat and as you can see, a top coat would add a bit of much needed shine to this polish. 'Manicurist Of Seville', as I stated earlier, was a fairly successful stamping polish. It's beautifully opaque and I think it has just the right amount of red to sit nicely with 'Mod About You'. I used a fairly thick single coat of 'Shine Of The Times' and that was easy to apply and spread evenly. Underneath all of this, I used Essie 'Millionails' and on top I used Sally Hansen's 'Insta-Dri'. 'Shine Of The Times' can be prone to eating up top coat, leaving a gritty texture, so I decided to go with this slightly thicker top coat and it still has a slight texture to the touch - though I'm not too worried. Hope you are all having a lovely Valentine's Day! I actually celebrated yesterday as I'm working tonight :)
Saturday, February 11, 2012

a-england - Princess Sabra (aka Tristam Eyes)

Auckland had a little bit of cloudless sun the other day so I happily tried another of the wonderful polishes from a-england's 'The Legend' collection. I decided to try 'Princess Sabra'. This polish actually has two names... It is also known as 'Tristam Eyes'. Adina has a beautiful tabby cat named Tristam and this polish is the colour of his eyes! I love that Adina has put that name on the bottle too. If you visit a-england on facebook, there are several pictures of the gorgeous Tristam showing off his own version of 'Princess Sabra'.


Princess Sabra, Tristam Eyes, The Legend, a-england, swatch
What an absolutely stunning polish! 'Princess Sabra' is gold with flashes of olive green and a beautifully subtle linear holographic effect.


Princess Sabra, Tristam Eyes, The Legend, a-england, swatch
This colour reminds me of the eyes of the Abyssinian cats that we had growing up.


Princess Sabra, Tristam Eyes, The Legend, a-england, swatch
This photo showcases the holographic nature of the polish in full sunlight! It's something quite special if you ask me. The gold is so elegant yet the holo gives the polish that extra spark.


Princess Sabra, Tristam Eyes, The Legend, a-england, swatch


Princess Sabra, Tristam Eyes, The Legend, a-england, swatch
These two photos show 'Princess Sabra' indoors with decreasing amounts of direct light. Seen in these conditions, 'Princess Sabra' becomes more understated - losing a little of the holo but gaining that slight olive tone. I love the olive that comes through in this polish, in real life it's much more obvious - even in more full light. It gives 'Princess Sabra' yet another point of difference that sets her apart.


Princess Sabra, Tristam Eyes, The Legend, a-england, swatch           Princess Sabra, Tristam Eyes, The Legend, a-england, swatch
Some close-up and macro action to attempt to show you how absolutely packed with sparkle this polish is. None of my photos come close to showing just how fine and dense the particles in 'Princess Sabra' really are. This is such a chameleon of a polish with the huge range of colour that the holo provides.


To the formula... AMAZING! So easy, an absolute pleasure to apply. I used three coats for full opacity. This polish was just the right viscosity to spread perfectly on the nail and I was left with a beautiful glossy finish. I used Essie 'Millionails' as my base and a-england 'The Shield' top coat. Once again, Adina has left me with a giant grin on my face and beautiful nails on my fingers!

This feline beauty, along with its six comrades, is available now on the a-england website with free worldwide shipping!