Hi!!
Just thought I would check in super quickly and say that I am still here and will be back so soon. My dissertation is due in a week! I still have a scary amount to do for it, but as soon as it's in I'll be back with some GORGEOUS polishes!! I can't wait.
I had to add in some nail pics so here's a mani that I did quite a while ago and haven't posted because I have no idea what polishes I used. This was one of those time where I had no plan and just started doing my nails while watching tv one night. I feel like it has a sort of graffiti feel to it. I know that I used the LeaLaC XL-B plate with Color Club 'Beyond' for the stamping.
Thanks heaps for sticking with me and I can't wait to be done with my dissertation and back to give this blog some love :)
Showing posts with label Color Club. Show all posts
Saturday, October 25, 2014
Saturday, March 8, 2014
Blue Ombré - Featuring piCture pOlish, Color Club and OPI
HI!!!
I'm still here! Apologies for the extended hiatus, I have just had my first week of uni and it has been crazy busy, albeit pretty freaking cool! It's so great to be in a lab doing real things! Anywho, I will try and get some posts lined up in the weekend in the future so that I don't go so long with nothing.
I tried an ombré mani for the first time last week. My first thought was blue, followed very closely by HOLO! So that's just what I went with…
I kinda love this mani! It makes me want to do more ombré manis and also makes me wonder why I've never done one before! I used piCture pOlish 'Cosmos' and 'Ocean' on my pinky and ring fingers, then Color Club 'Over The Moon' and OPI 'DS Sapphire' on my middle and index fingers.
I won't go much into formula etc, other than to say that these polishes are all pretty great formula-wise (other than the fact the the OPI is slightly sheer and oh-so-stinky).
What are your favourite colours for ombré manis?
I'm still here! Apologies for the extended hiatus, I have just had my first week of uni and it has been crazy busy, albeit pretty freaking cool! It's so great to be in a lab doing real things! Anywho, I will try and get some posts lined up in the weekend in the future so that I don't go so long with nothing.
I tried an ombré mani for the first time last week. My first thought was blue, followed very closely by HOLO! So that's just what I went with…
I won't go much into formula etc, other than to say that these polishes are all pretty great formula-wise (other than the fact the the OPI is slightly sheer and oh-so-stinky).
What are your favourite colours for ombré manis?
Labels:
Blue
,
Color Club
,
Holographic
,
Ombré
,
OPI
,
Picture Polish
Sunday, February 23, 2014
A Special Mani for a Special Man
Hi all!
Another quick post today. This is a mani I did last weekend for our quick trip to Wellington. Without getting into too much detail, this mani was done to honour someone incredibly special to me…
As the base for this mani, I used Enchanted Polish 'Lucy in the Sky with Diamonds' and I then stamped on top using MoYou plate 11 from the Artist Collection with a-england 'Perceval' and Color Club 'Beyond'.
Thanks for stopping by x
Labels:
a-england
,
Color Club
,
Enchanted Polish
,
MoYou
,
Stamping
Tuesday, February 4, 2014
Eternal Beauty - Color Club
Hello!
Sorry for a slight lack of posts in the last week, life got a bit crazy. Anyway I have a short and sweet post today of what I am currently wearing on my nails…
This is Color Club 'Eternal Beauty'. In case you didn't realise already, these Color Club Halo Hues are some of my most loved polishes in my whole collection and this one is no exception. It is gorgeous and like all the others has a very strong linear holo effect. What I love best about these polishes is how versatile they are. I use them in so many different nail art things - they stamp so well. On top of 'Eternal Beauty', I used some of my new coloured studs on top that I just purchased from Born Pretty Store.
I used 2 coats for these photos, but the 2nd coat was barely needed. These polishes are really easy to work with and beautifully opaque. They don't pull, they dry fast and they don't dull with top coat.
Labels:
Color Club
,
Holographic
,
Purple
,
Studs
Sunday, January 5, 2014
Her Rose Adagio - a-england
Press Sample
Hello!I have another of the new a-england polishes to show you tonight that is from the very recent Ballerina Collection. Tonight, I am showing you 'Her Rose Adagio'. If you follow me on Instagram, you may have already seen how I wore this polish, but more about that later…
This is yet another beauty and it is so fitting for this collection in my opinion. This gorgeous rose colour is so perfectly reminiscent of ballet to me - the shoes, the grace and beauty. It's a funny thing, but 'Her Rose Adagio' makes me miss doing ballet every day.
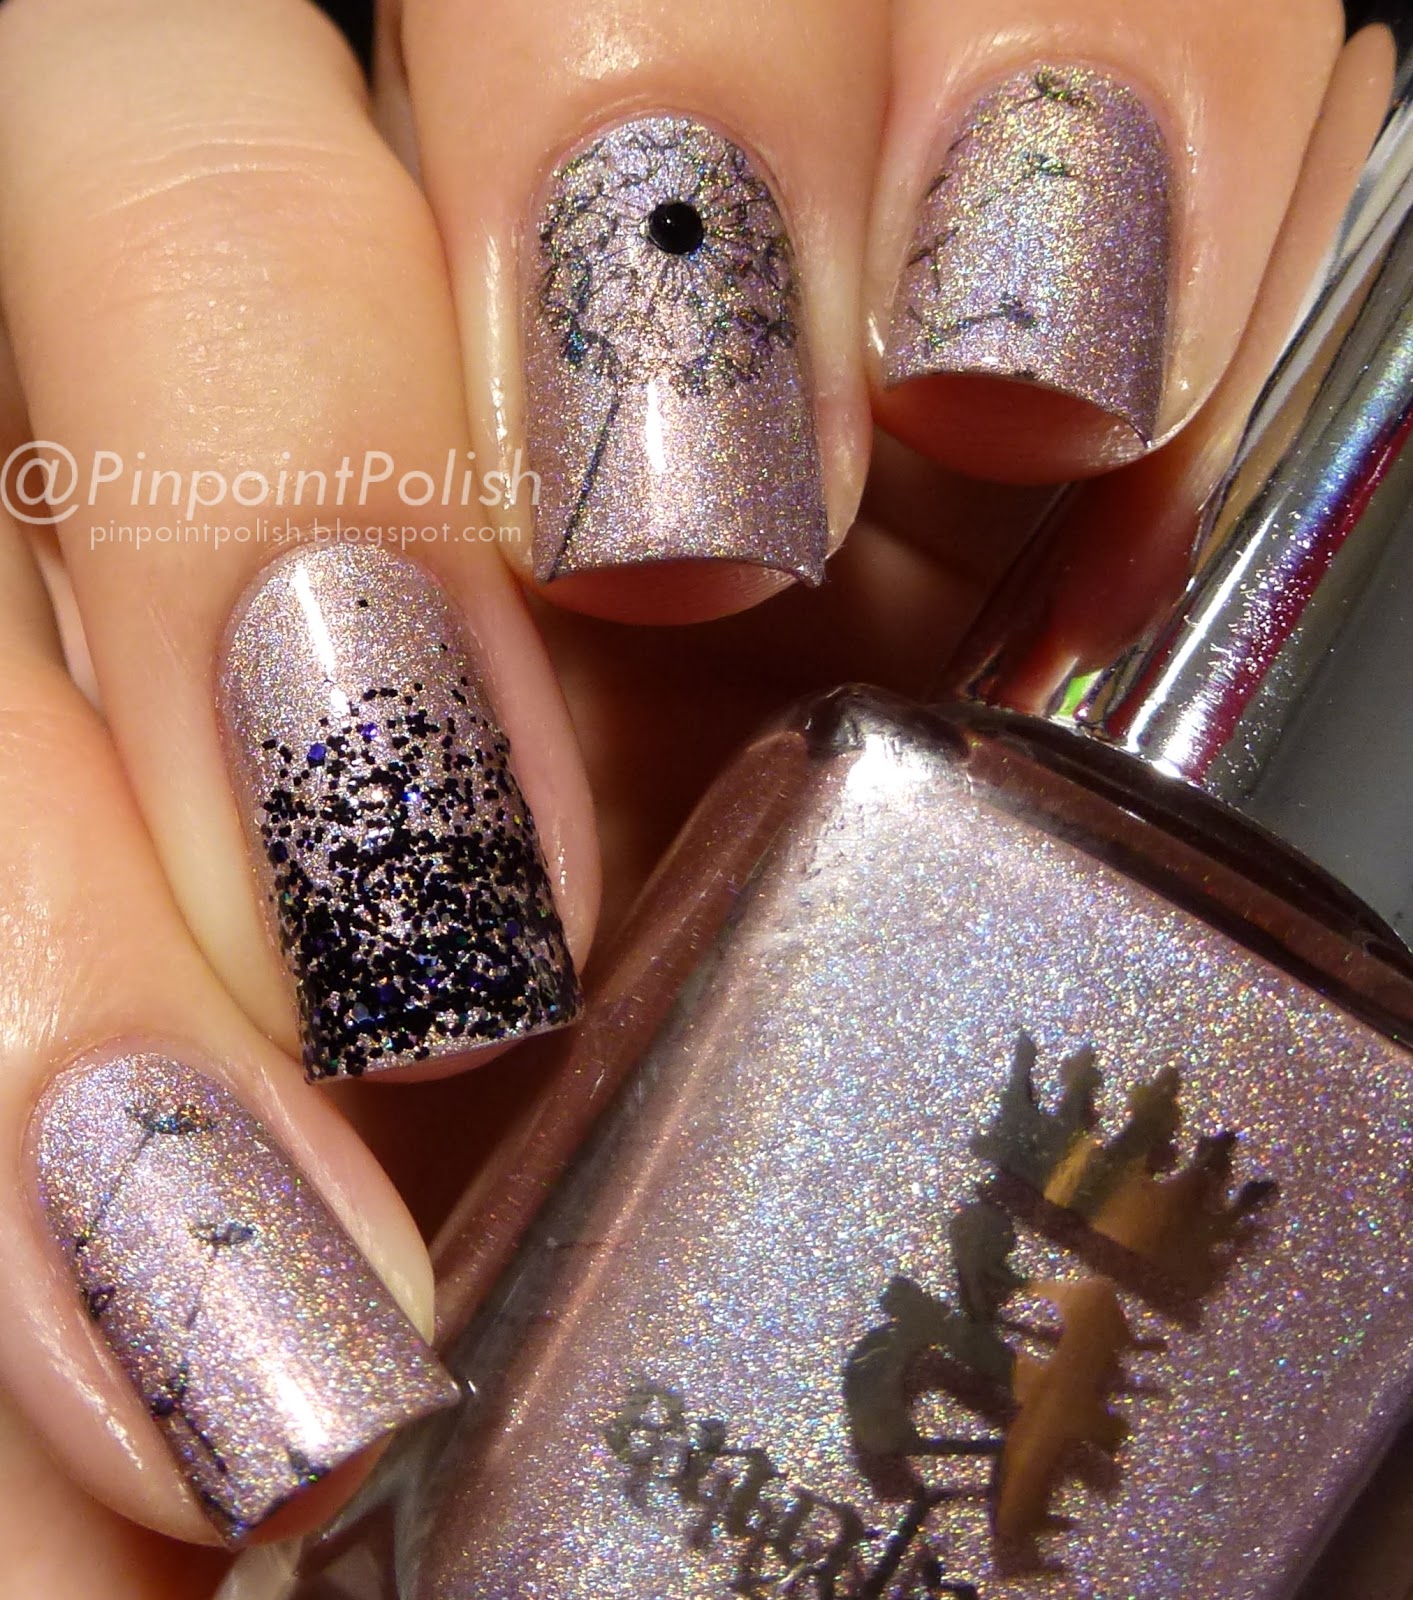
So here's how I first wore this polish. On the 18th of December, a lovely friend, who you have seen mentioned on here so many times, got married and a group of us did manicures in her honour. So this mani, was for Mimi of Makeup Withdrawal and her new husband. Be sure to check out the other talented ladies who did manis for Mimi too (they are all listed in this instagram image). On top of 'Her Rose Adagio' I stamped the images using MoYou plate 06 from the Pro Collection and Color Club 'Beyond'. On my ring finger is a glitter gradient using CrowsToes 'Triple Black Diamond'.
Yes, as usual with a-england polishes, the formula was easy to use. 'Her Rose Adagio' was slightly thick, though not in a bad way at all, and requires just 2 coats for full opacity. One thing to be careful of, make sure you don't do too many strokes in one place with the first coat as it can drag ever so slightly.
a-england polishes can be purchased from a lot of places around the world. Unfortunately, you can only order direct from them if you are in the UK, but be sure to check out their list of worldwide distributors to find a place close to where you live. You can also follow a-england on Twitter, Facebook and Instagram to keep up with the latest news from them.
This product was provided for review. This is my personal, unbiased opinion.
For more information, see my disclosure policy.
Labels:
a-england
,
Color Club
,
MoYou
,
Pink
,
Stamping
Saturday, December 28, 2013
NOTD - Enchanted Polish 'Disco Barbie' & MoYou stamping
Merry Christmas! Hope everyone had a lovely restful break. I spent mine at home with my family which was lovely. It's so nice being at home, other than the fact that it feels like Winter here! I just have a quick mani to show you today that I wore earlier in December when my MoYou stamping plates arrived and I had to test them ASAP.
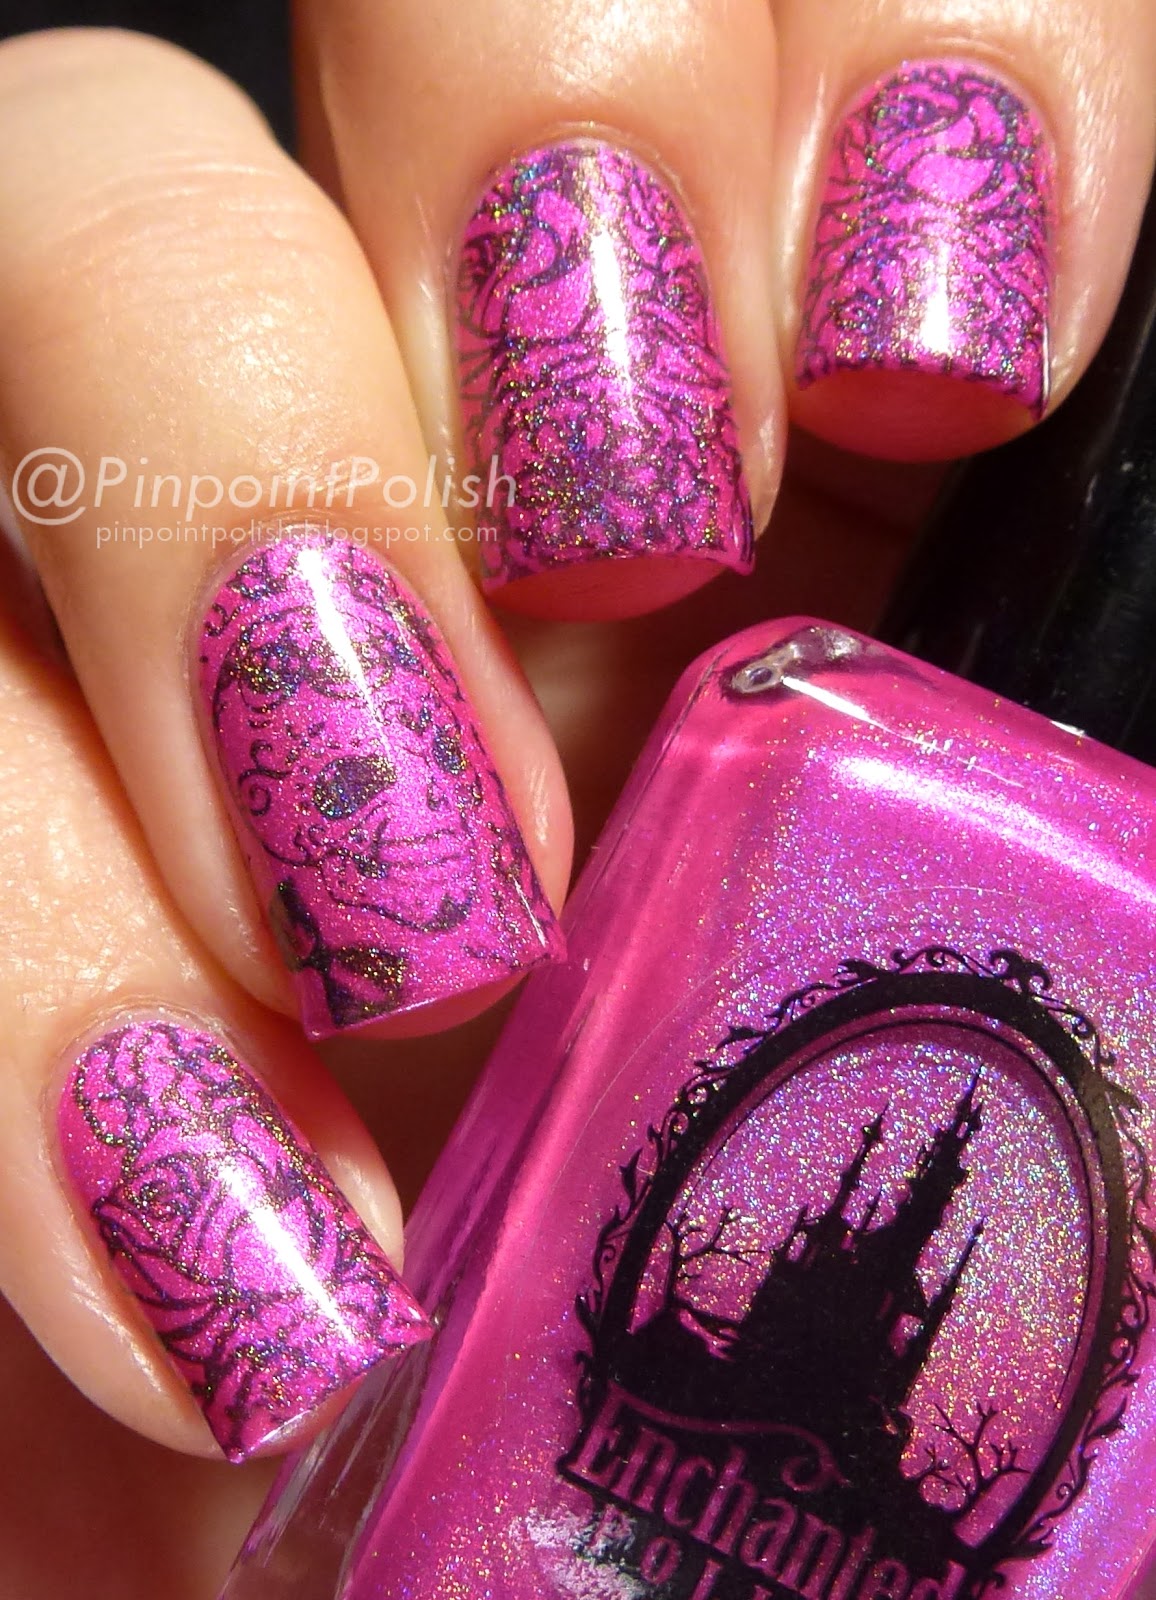
I used Enchanted Polish 'Disco Barbie' for the base and then stamped on top of it using Color Club 'Beyond' and MoYou plate 11 from the Artist Collection. I used the area around her hair for both of these images.
First up I need to mention how impressed I am with my MoYou plates. Not only are the full sized images incredibly beautiful, but they are easier than I expected to use - as far as getting the part of the image I wanted onto my nails etc. 'Disco Barbie' was also really great. I barely needed the second coat I used, as it was so opaque.
I am really keen to get some more MoYou plates, especially some full sized images, so please let me know any that you recommend! If you haven't seen them, make sure you have a look at their website - fair warning though, you may want to buy EVERYTHING!
Labels:
Color Club
,
Enchanted Polish
,
Holographic
,
Indie
,
MoYou
,
Pink
,
Stamping
Wednesday, November 13, 2013
Over The Moon - Color Club
Hi!
I have finished exams and that means I have finished my degree! It feels so good. Not that that's the end though. I am heading back to uni next year to do Honours and will hopefully start my PhD after that, if all goes to plan. So exciting things to come for me there.
Anywho, I quickly painted my nails after my exam, before work yesterday with Color Club 'Over The Moon'.
Here's a sample of what has been happening. Yes this is the same photo. And hopefully Blogger doesn't mess with these too - it will probably not do it here and they'll look normal x)
I have finished exams and that means I have finished my degree! It feels so good. Not that that's the end though. I am heading back to uni next year to do Honours and will hopefully start my PhD after that, if all goes to plan. So exciting things to come for me there.
Anywho, I quickly painted my nails after my exam, before work yesterday with Color Club 'Over The Moon'.
Here is 'Over The Moon' in all her holo glory. I cannot ever get enough holo in my life. Color Club really does holo well. I love the shade of blue in this too. Kind of icy. Really flattering for a blue I think.
The formula was spectacular on 'Over The Moon' as it has been with the other Color Club Halo Hues I have worn. 2 thin coats is all that was needed for full opacity.
On a side note, I am having serious issues with Blogger at the moment changing the colours of my photos. I have managed to revert my previous photos that were looking HIDEOUS by changing the auto-enhance setting etc, but I'm still trying to work it all out. Apologies for any that Blogger so kindly messed with. I promise I don't terribly fake tan my fingers and I also promise that I don't photograph nails of cadavers and publish them.
Here's a sample of what has been happening. Yes this is the same photo. And hopefully Blogger doesn't mess with these too - it will probably not do it here and they'll look normal x)
Labels:
Blue
,
Color Club
,
Holographic
Sunday, October 20, 2013
The Halloween Mani that Isn't...
Hi!
I have a mani on today that was originally going to be very different and was set to be my first Halloween mani of the year. I always try what I'm going to do on my left hand first, but when I stamped over the polishes I used on my left hand it didn't show very well, so I decided to use the same colours with paler polishes... Long story short, it is no longer even remotely Halloween-ish other than the fact that the Dollish Polish glitter is part of a Halloween collection :D
So as you can see, not overly Halloween-inspeired in the end, but oh well. Once I saw how the gradient on my middle finger looked, I knew I had to use a chevron stamp inspired by my biggest nail crush of all time, Lauren of Tales About Nails!
Polishes used... The base for the glitter is Lime Crime 'Peaches <3 Cream' and the glitter is Dollish Polish 'What's This? What's This?' from last year's 'This is Halloween' collection (which has been rereleased in limited quantities this year). On my middle and index fingers is a gradient and water marble using Lime Crime 'Peaches <3 Cream', 'Pastelchio' and 'Lavendairy'. These are both stamped using Color Club 'Beyond' with Bundle Monster plates BM-408 (index) and BM-423 (middle).
As mentioned, Dolly has brought back last year's Halloween collection by popular demand. At the time of writing this post, these are still in stock, so hop over to her shop ASAP and grab them because they are awesome!!
I have a mani on today that was originally going to be very different and was set to be my first Halloween mani of the year. I always try what I'm going to do on my left hand first, but when I stamped over the polishes I used on my left hand it didn't show very well, so I decided to use the same colours with paler polishes... Long story short, it is no longer even remotely Halloween-ish other than the fact that the Dollish Polish glitter is part of a Halloween collection :D
Polishes used... The base for the glitter is Lime Crime 'Peaches <3 Cream' and the glitter is Dollish Polish 'What's This? What's This?' from last year's 'This is Halloween' collection (which has been rereleased in limited quantities this year). On my middle and index fingers is a gradient and water marble using Lime Crime 'Peaches <3 Cream', 'Pastelchio' and 'Lavendairy'. These are both stamped using Color Club 'Beyond' with Bundle Monster plates BM-408 (index) and BM-423 (middle).
As mentioned, Dolly has brought back last year's Halloween collection by popular demand. At the time of writing this post, these are still in stock, so hop over to her shop ASAP and grab them because they are awesome!!
Labels:
Bundle Monster
,
Color Club
,
Dollish Polish
,
Glitter
,
Gradient
,
Green
,
Indie
,
Orange
,
Purple
,
Stamping
,
Water Marble
Friday, September 20, 2013
The Pit of Despair - Dollish Polish
Hi!
So I'm carrying on with showing you the Dollish Polish 'The Princess Bride' collection polishes that I managed to snag when Dolly first released them. I've loved them all so far (see the previous posts here, here and here) and I seem to have done a mini art-y feature nail with each polish so I figured I may as well carry that on. Tonight is 'The Pit of Despair'...
I love how this turned out actually. First of all, I like 'The Pit Of Despair', it has a nice mix of glitter. Mainly the glitter is purple, blue and black, but there is also some flakes in there, little holo glitters and even some shimmer too. 'The Pit Of Despair' is pictured over Lime Crime 'Milky Ways'. I love the way the feature nail fits with this mani. For the gradient I used Essie 'Butler Please', Lime Crime 'Once In A Blue Mousse' and 'Milky Ways', then I stamped with Color Club 'Beyond' with Bundle Monster plate BM-201.
'The Pit Of Despair' was ok formula-wise. There was pretty decent coverage. I used 1 and a half coats. I did have to go on a little fishing expedition for the large hex and a square, but I did get squares on other fingers so they do come out, just not on my swatching hand of course!
At the time of writing this, 'The Pit of Despair' is in stock on Dolly's Big Cartel shop, so hop over there and grab it for $10.
Labels:
Bundle Monster
,
Color Club
,
Dollish Polish
,
Glitter
,
Gradient
,
Indie
,
Lime Crime
,
Stamping
Friday, August 9, 2013
Kismet - Color Club
Holy moly, where does time go?! I forgot to post yesterday! Well tonight I have a couple of pics of Color Club 'Kismet'. Depending on how long you've been following me, you may or may not know that my middle name is in fact Kismet (much to my friends' amusement when I was younger). Due to its meaning, which I love, I also have Kismet tattooed on my wrist, so naturally I HAD to have this polish and I finally got it a few weeks back (see this Color Club 'Halo Hues' mani).
I love it. We all should know by now that holos are my weakness in life (along with multichromes). I love ALL THE HOLOS! 'Kismet' is a really pretty soft gold that is really wearable. It appears to almost have a slight olive/green cast to it that I really like.
Formula was really easy with 'Kismet' too. I used 2 coats with a regular base coat and these pictures are also with top coat (as you can see the holo effect is still outrageously brilliant).
Until next time... x
Labels:
Color Club
,
Gold
,
Holographic
Wednesday, July 10, 2013
Beyond - Color Club & Some Holo Nail Art!
Hi people!!
How are you all? I've just had a really lovely mini-holiday on Waiheke Island and considering it is the middle of winter, the weather was so perfect. If you follow me on Instagram (@pinpointpolish) you may have seen some pics of it. Anywho, I went to the NZ Beauty Expo on Saturday and managed to finally get my hands on the latest Color Club Halo Hues (how did it take so long?!), so naturally I had to try one as soon as I got home. And by try one, what I mean to say is try all 6... at once ;)
A mani that Sam (from Fashion Polish) did a bit ago was certainly the inspiration for this mani, though I went about this one quite differently from what Sam did. For my take on this look, I used Saran Wrap. I love how it turned out. I used all of the holos in the collection for this look. 'Beyond' was the base and then using the Saran Wrap, I dabbed on 'Kismet', 'Cosmic Fate', 'Miss Bliss', 'Over The Moon' and 'Eternal Beauty'.
You can see the colours better in this photo, as you would be able to see them in real lower light. I love how the black base of 'Beyond' peeks through. To say these holos are full-on would be a serious understatement. It was so hard to capture the colours in this mani without just seeing holo in my photos. I had to crack out the light box for once.
Here is 'Beyond' all by itself. AMAZING! These polishes have a really strong linear holo finish. It is far from subtle and I love it. These photos are shown without top coat, just because I was going to be putting things on top of it. To be honest though, I think top coat makes the holo even more awesome!
Formula of 'Beyond' was sensational too. No aqua base or any other faffing around required. And it was really opaque. I only needed 1 coat on my left hand, but for the sake of neatness on my swatching hand, I have shown you 2 coats. As I mentioned, shown is without top coat, but as you can see with the top pics (with top coat), there isn't any dulling of the holo effect.
Color Club is sold a lot of places. For the kiwis, I know these are sold in Amazon stores, but they can also be purchased online from a lot of places.
Some of these products were given to me. This is my personal, unbiased opinion.
For more information, see my disclosure policy.
How are you all? I've just had a really lovely mini-holiday on Waiheke Island and considering it is the middle of winter, the weather was so perfect. If you follow me on Instagram (@pinpointpolish) you may have seen some pics of it. Anywho, I went to the NZ Beauty Expo on Saturday and managed to finally get my hands on the latest Color Club Halo Hues (how did it take so long?!), so naturally I had to try one as soon as I got home. And by try one, what I mean to say is try all 6... at once ;)
A mani that Sam (from Fashion Polish) did a bit ago was certainly the inspiration for this mani, though I went about this one quite differently from what Sam did. For my take on this look, I used Saran Wrap. I love how it turned out. I used all of the holos in the collection for this look. 'Beyond' was the base and then using the Saran Wrap, I dabbed on 'Kismet', 'Cosmic Fate', 'Miss Bliss', 'Over The Moon' and 'Eternal Beauty'.
You can see the colours better in this photo, as you would be able to see them in real lower light. I love how the black base of 'Beyond' peeks through. To say these holos are full-on would be a serious understatement. It was so hard to capture the colours in this mani without just seeing holo in my photos. I had to crack out the light box for once.
Formula of 'Beyond' was sensational too. No aqua base or any other faffing around required. And it was really opaque. I only needed 1 coat on my left hand, but for the sake of neatness on my swatching hand, I have shown you 2 coats. As I mentioned, shown is without top coat, but as you can see with the top pics (with top coat), there isn't any dulling of the holo effect.
Color Club is sold a lot of places. For the kiwis, I know these are sold in Amazon stores, but they can also be purchased online from a lot of places.
Some of these products were given to me. This is my personal, unbiased opinion.
For more information, see my disclosure policy.
Labels:
Color Club
,
Holographic
,
Saran Wrap
Wednesday, October 10, 2012
Inspired by... Jean Paul Gaultier
I have something a little different today and it's something that I quite like. We all know that I'm a little lacking in the art department and to be honest the thought of it scares the living daylights out of me still. I think a main problem of mine is that I'm not a very creative person and so I think to myself, I should do some sort of nail art today... Then I'll sit for an hour desperately trying to think up a brilliant idea, meanwhile I've thought up a million reasons why I shouldn't do it and I end up painting my nails with one plain colour... So here's what I am trying to do now - I'm trying to find inspiration from what's around me, which is where todays mani comes in.
Sitting up on my bookshelf was one of Dan's old empty Jean Paul Gaultier bottles and for once I was hit with inspiration. So I grabbed my bottle of the same summer edition for Women (I think 2006?) and got painting.
Please excuse my over-zealous top coating, will I ever find the key to not smudging stamping?
I used Color Club 'Wicked Sweet' as the blue base (over white) and Nicole 'Paparazzi Don't Preach' for the peach accent (also on my thumb). I then used the saran wrap technique to dab on the clouds using OPI 'My Boyfriend Scales Walls'. I added OPI 'Stranger Tides' to tie in the green of the kites with a tiny piece of sponge, then stamped using Konad Special Red polish. I used BM02 (I only used half of the image).
Alright, laugh it up!! I'm still getting my head around holding polish bottles and not looking terribly unco. Let's just say holding torso shaped bottles is not one of my best skills!
I love how this turned out and I think this inspiration thing is the way to go. Between The Boy and Me, we have a fair number of different editions of JPG perfume bottles and I am so much in love with every single one, so you will be seeing some more of these for sure.
Labels:
Blue
,
Color Club
,
Nicole by OPI
,
OPI
,
Peach
Friday, May 11, 2012
Gradient Nails
So I have my first attempt at proper gradient nails to show you today :) I've always loved the look of gradient nails but I haven't really ever thought I could pull them off. I have dabbled in sponging a bit of glitter on my tips but that's about as far as I've gone. Until....... Sammy from The Nailasaurus posted this amazingly easy to follow tutorial... As un-creative as I think I am, I actually figured maybe I could manage this. So here we go, this is my take on gradient nails...
I wanted to use colours that were very different and do something nice and bright. What better than neon pink and navy. The pink I used is Color Club's 'Warhol' and for the navy, I used OPI's 'Yoga-Ta Get This Blue' (one of my favourites!!).
As usual, the neon was near impossible to capture colour-corectly, but this photo is pretty close. 'Warhol' is a super bright, saturated pink. I love the shimmer in 'Yoga-Ta Get This Blue' too.
While I was wearing this mani, I got some SWEET nail mail from Ninja Polish. I ordered Nail-Venturous 'Floam' and 'A Dash of Princess'. Naturally as soon as they arrived, I had to try one of them and surprisingly it was 'A Dash of Princess' that really piqued my interest. Well, I gotta say, I LOVE this polish!
'A Dash of Princess' is absolutely packed with a mix of large and medium hex glitters in pink, white and some sort of pearly ones (see my ring finger tip), as well as little wee pink hex glitters. Love, love, love! I don't know what else to say but just that, I love it!
I'm not even going to start to tell you how I did this because if you haven't already, you should all head straight over to Sammy's blog because she explains it all brilliantly. And while you're there, check out the rest of her blog, she is basically freaking awesome at all things nails, especially when it comes to nail art.
As to the formulas, 'Warhol' is pretty easy to work with. I used two coats and it was ever so slightly see-through at the tip, but that was OK because the navy was going on top. 'Warhol' does dry matte (usual for neons) so top coat is definitely necessary, but to be honest, you'll be needing top coat to smooth out the sponging anyway. 'A Dash of Princess' was also really easy to use. Sometimes these sort of glitters can be a pain, but this is so dense that you get heaps on the brush and it's pretty easy to place the pieces where you want them.
I absolutely loved sporting this look and I definitely will be trying this again. I got so many comments on it too :) Most of all, thanks Sammy for making that tutorial. I love that you've created such a monster with it. Gradient nails are taking over since that post and I love it!
Labels:
Color Club
,
Glitter
,
Gradient
,
Indie
,
Nail-Venturous
,
Navy
,
Neon
,
OPI
,
Pink
,
Shimmer
Subscribe to:
Posts
(
Atom
)