Showing posts with label Foil. Show all posts

Monday, June 23, 2014

a-england - Excalibur Renaissance

Press Sample

Hi!!

I've finished exams! YAHOOO. Although I am not having a break, it is nice to be back in the lab and be able to come home in the evening and relax a bit (and do my nails). I have an a-england to show you today which will most likely be a bit of an old friendly face despite this being a new release. Excalibur was originally retired and revamped (you can see that version here), but recently 'Excalibur Renaissance' was released.


Excalibur Renaissance, a-england, swatch

Excalibur Renaissance, a-england, swatch
'Excalibur Renaissance' is a gorgeous platinum/silver metallic foil polish. This is quite a striking polish when worn as a full mani. It seriously catches the light in the most eye-catching way. Gorgeous. This is very similar to the original 'Excalibur', but to my eye the shimmer is a little finer. I think that makes this polish a little smoother and less brush strokey than the original.


Excalibur Renaissance, a-england, OPI Manicurist of Seville, MoYou Artist 01
My favourite way to use 'Excalibur' has always been as a stamping polish as it's so darn opaque. 'Excalibur Renaissance' lived perfectly up to my expectations and stamped just as easily as its predecessor. Here, I have stamped using 'Excalibur Renaissance' and MoYou plate 01 from the Artist Collection - underneath is OPI 'Manicurist of Seville'.


Overall, this polish was up to the usual high a-england standard as far as formula goes. Opacity is ridiculously good with one coat being super opaque. The only thing is that a little care needs to be taken  to minimise brush strokes, but it's not too bad.


a-england polishes can be purchased from a lot of places around the world. Unfortunately, you can only order direct from them if you are in the UK, but be sure to check out their list of worldwide distributors to find a place close to where you live. You can also follow a-england on Twitter, Facebook and Instagram to keep up with the latest news from them.


This product was provided for review. This is my personal, unbiased opinion.
For more information, see my disclosure policy.

Monday, December 23, 2013

Polished By KPT - Dark Angels & Liquid Gold

Press Sample

Hi!

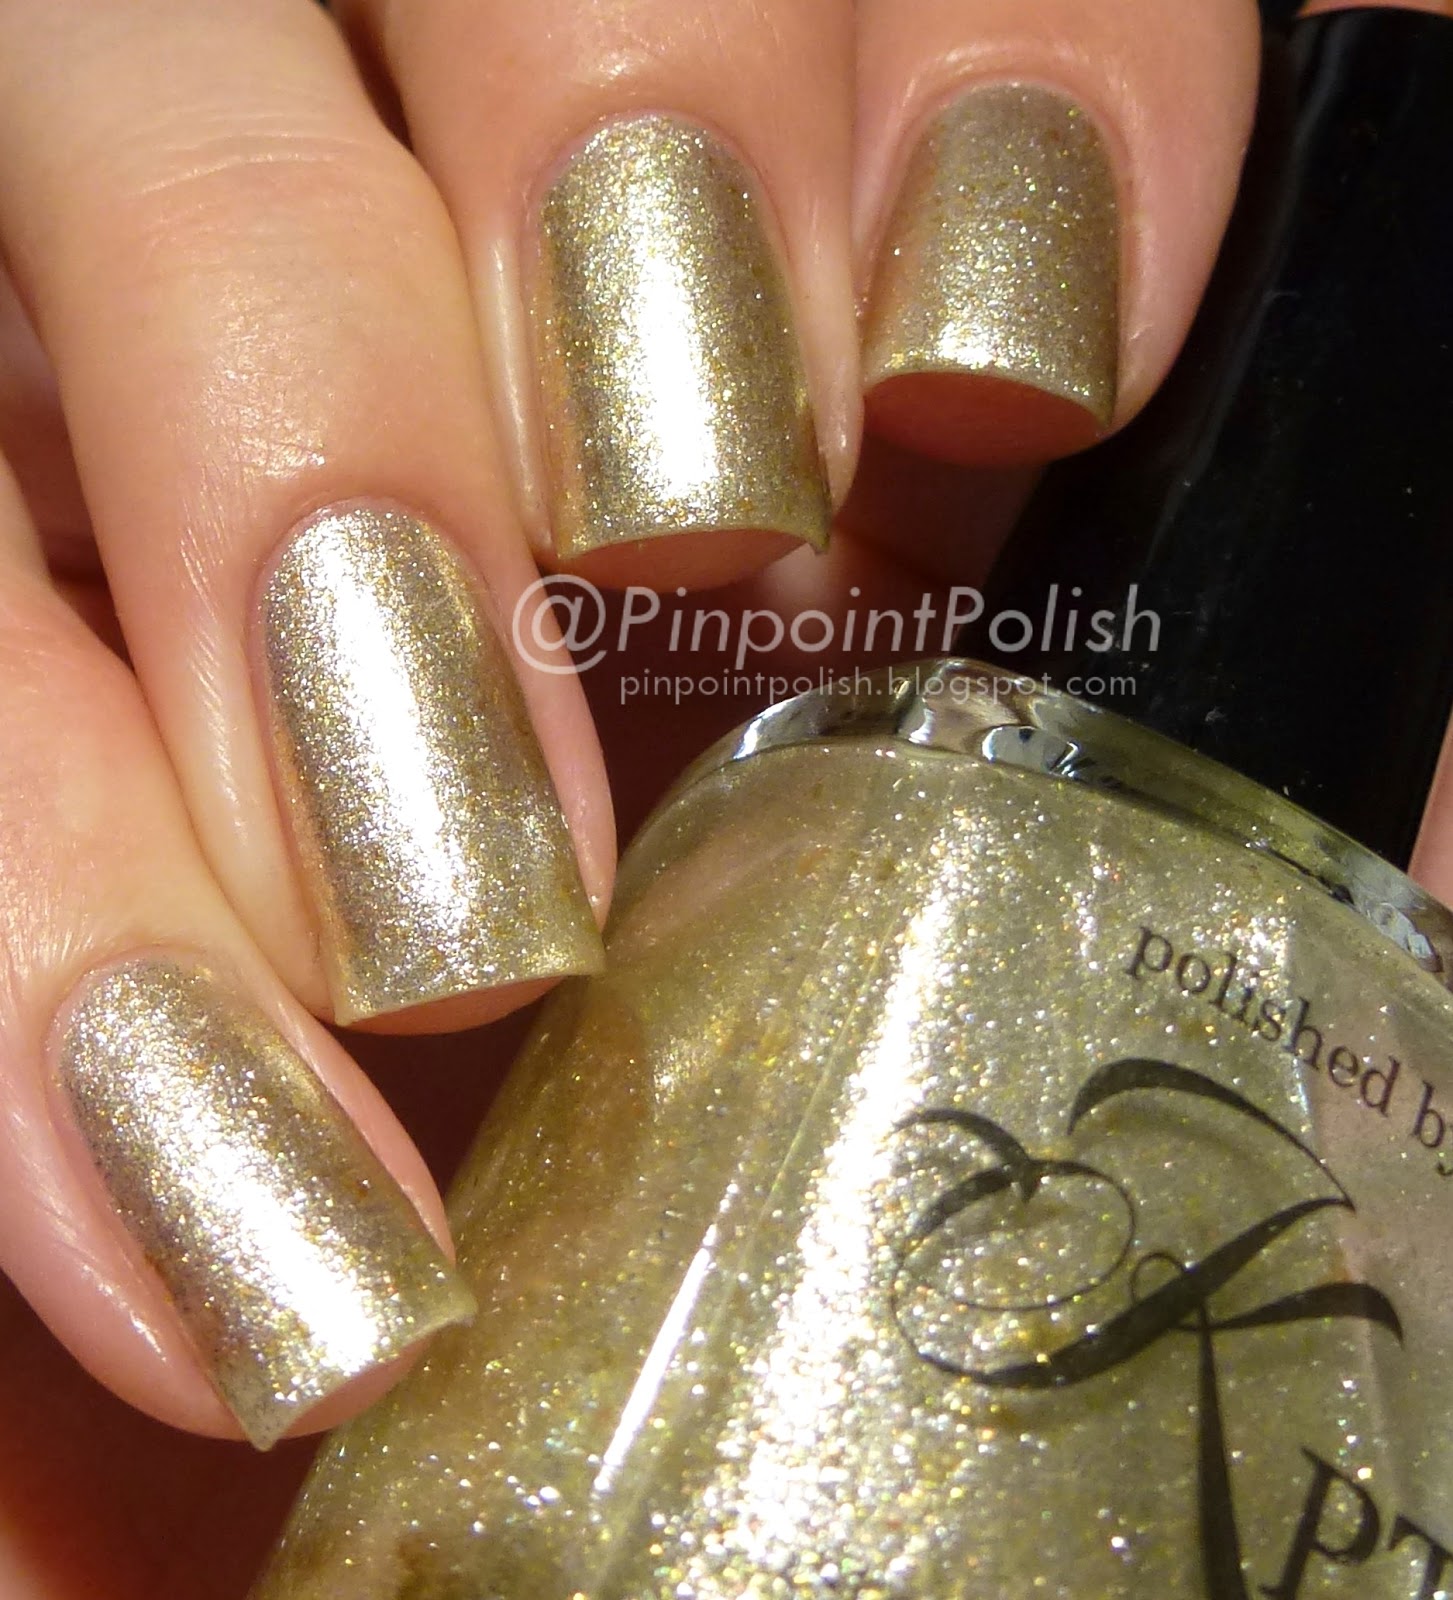
I have the last 2 Polished By KPT polishes to show you today. I have one foil chrome effect polish and one holographic effect polish. First up 'Liquid Gold'.


Liquid Gold, Polish By KPT, swatch

Liquid Gold, Polish By KPT, swatch
'Liquid Gold' is a gorgeous pale, almost champagne gold colour and it is full of more yellow gold irregular flakes. I tend to stay away from gold polish mostly because I am so pale, but still with yellow undertones so I don't suit a lot of golds (though I only wear gold jewellery… weird…), but this one is light enough that it was really pretty. I like how the flakes give the polish a sort of gilded effect, it's so Christmassy to me.


Dark Angels, Polished By KPT, swatch

Dark Angels, Polished By KPT, swatch
Now for a real favourite of mine! This is 'Dark Angels' and it is a holographic beauty. When I first opened up my parcel from Katherine, I saw this and knew I'd love it - dark + holographic is always going to equal love for me - but it was once I put it on, I got a pleasant surprise. At certain angles, there is a slate/blue look to this polish, then on extreme angles it shines red! I love that this is so much more than a black holo, basically I love a polish that can surprise me.


Both of these were, as usual, easy to apply. I used 3 coats for both. 'Dark Angels' was a little thicker (not at all in a bad way), so potentially if you use thinner coats than I did, you may need 4 coats. 'Liquid Gold' was also perfectly smooth after one normal coat of top coat.


Polished By KPT polishes are available direct from Katherine's Big Cartel shop if you're in the USA. For those international people, check out this 'where to buy' tab. All polishes are 3-free and not tested on animals.


MERRY CHRISTMAS EVERYONE!


These products were provided for review. This is my personal, unbiased opinion.
For more information, see my disclosure policy.

Friday, September 6, 2013

Excalibur - Version 2.0 - a-england

Hello!

I have the final polish from a-england's most recent releases to show you this evening. Tonight's polish is 'Excalibur' (version 2.0)...


Excalibur, a-england, swatch

Excalibur, a-england, swatch
'Excalibur' (2.0) is a silver foil, but there is certainly a lot of complexity. 'Excalibur' is packed full of bronzey gold particles to give it an almost gilded look. It gives it a slight antique look to me. These photos show 'Excalibur' without top coat.


Excalibur, a-england, LeaLac XL-B stamping
I decided to do a bit of stamping over 'Excalibur' and this is the final product. I kept the stamping in the family, so to speak, and used a-england 'Bridal Veil' and 'Perceval' to stamp with and LeaLac XL-B stamping plate. Just to finish everything off, I added a couple of studs to each finger.


'Excalibur' was really easy to apply. I used 2 coats here for full opacity. As mentioned, the top photos show 'Excalibur' without top coat and if you were wearing it on its own, I'd certainly recommend top coat (as usual). I really enjoyed the final look and it got a fair few mentions, though people kept asking me if they were stickers ;)


a-england polishes can be purchased from a lot of places around the world. Unfortunately, you can only order direct from them if you are in the UK, but be sure to check out their list of worldwide distributors to find a place close to where you live.


This product was provided for review. This is my personal, unbiased opinion.
For more information, see my disclosure policy.
Monday, February 20, 2012

Designer... De Better! - OPI

I have been braving the glitters a lot lately, I must say, even though I so desperately dread their removal (thank goodness for the old tin-foil trick!). Today I have a pretty full-on foil for you all from OPI's recent holiday collection - The Muppets Collection. This is 'Designer... De Better!'


Designer... De Better!, OPI, The Muppets Collection
I've never worn a silver foil before because I feel they can be a little obnoxious (plus I feel as though I should be donning a silver foil space suit to match), but 'Designer... De Better!' has a little secret weapon to make it slightly more approachable in the form of its copper particles. In bright full sunlight (see the right side of my nails), this polish becomes mirror like and oh-so-shiny...


Designer... De Better!, OPI, The Muppets Collection
... Head into some shade and the copper/orange colour really takes the stage, giving this the look of an entirely different polish.


Designer... De Better!, OPI, The Muppets Collection

The usual close-up action so you can see those great little copper pieces that mean that I was brave enough to wear (and enjoy wearing) this polish. The main silvery colour of this polish is actually slightly leaning to a creamy silver which seems to add to the appeal.


Absolutely easy application. I did use three coats but I'm not convinced that I actually needed the last one. Removal was, as expected, an absolute bugger. For anyone reading this blog who doesn't know about the tin-foil method of removal... You soak a cotton pad in remover and wrap it around your nail, wrap some tin-foil around the cotton pad and forget about it for a couple of minutes. I actually usually wrap around two or three fingers together with one pad and foil, leaving me with little crab pincers for a while :) After a bit, put a little pressure on your nail through the foil and pull it off the nail (wiping along the nail as it comes off) and ta-da... Most of the polish should have come off in one go. This way of removing glitter polishes is the only reason I dare to use them. One thing... the remover will leave your skin pretty dry after so make sure you give your cuticles some extra TLC. One more tip... If you are doing any clean up of this polish after painting your nails, beware! The glitter will go EVERYWHERE!! I used Essie 'Millionails' as the base coat and again I opted for the slightly thicker Sally Hansen 'Insta-Dri' as the top coat to try to avoid a funny texture.