Hi guys!
I am so close to finishing exams. One week (2 exams) to go. I'm really looking forward to having some time to try some more nail art. I miss it. I just have a super quick post today of something I wore a couple of weeks ago. It's cold and wintry here and I just felt like a nice, simple crème for once. Essie 'Power Clutch' fit the bill perfectly.
'Power Clutch' is such a cool polish. It's a slate-y olive green that is fairly dark and brooding. It's a bit of a chameleon to look at. Sometimes it appeared more charcoal grey, sometimes more olive. Either way, I really like the colour. Perfect for the winter weather here (not that I ever go by the season).
The formula was really nice. This seems to be the formula that people always rave about Essie having. Unfortunately the first 2 Essie's I tried weren't great, formula-wise, so they scared me off a little. But since then, I have been using Essie's like this one and 'Bungle Jungle' and I now understand the love. 'Power Clutch' was nice and thin (not too much though) and levelled easily on the nail. It was also perfectly opaque in 2 coats.
Also a big thanks to Mimi (from Makeup Withdrawal) for getting this baby to me a while back :)
Sunday, June 23, 2013
Wednesday, June 19, 2013
G'day Matte - piCture pOlish
Hi guys!
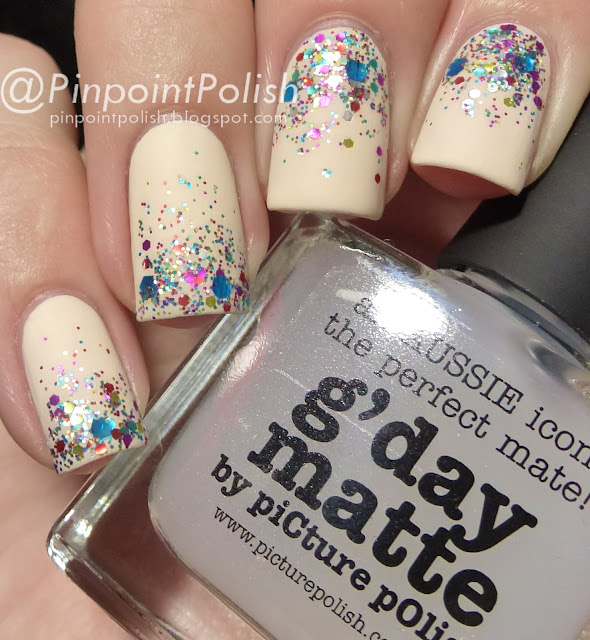
I am sad to say that my piCture pOlish review series is coming to a close today! I've really loved all of the polishes that I got to show you. I have a pretty awesome polish to finish on. This is their fairly new matte top coat, 'G'day Matte'. I absolutely love me some matte nails, but I haven't posted many on here because I have trouble making them look good. I have always used Essie 'Matte About You' and have always had a bit of trouble with it, but 'G'day Matte' is a whole different story. I love it.
One more thing, if you follow me on Instagram, you may have seen that I did a spot of hand modelling on the weekend for the awesome kiwi designer, Saben. We got our nails done by the lovely Leah Light and her team. It was heaps of fun, but they needed us all to have almond shaped nails. As you know, I keep my nails very square usually. I have started to head back that way, but they are very short (especially at the sides) so bear with me while I grow them back to my usual square shape :)
Anyway onto 'G'day Matte'...
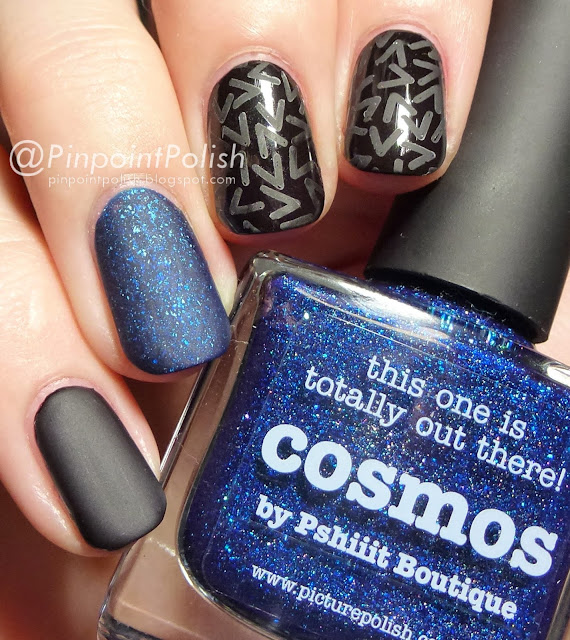
So here's the bottom line. 'G'day Matte' is amazing! It is so incredibly forgiving and is so so so easy to use. I don't care how who you are, you will be able to rock this baby! Look how pretty it is over 'Cosmos'. Love it - I don't know what else to say. I used 'LeaLaC XL - B' stamping plate and I used a-england 'Lancelot' and, of course, piCture pOlish 'Cosmos' as the bases.
Déjà vu anybody? When I did my mani with piCture pOlish 'Blogger', I mattified it and, holy moly, it looked cool. I've never ventured into the land of matting glitter before, but I'm thinking this won't be the last time.
So I already said that the formula is amazing. As I said, it is incredibly forgiving. Absolutely zero trouble at al. It levelled out perfectly and as usual with a matte top coat, dried really fast. Speaking of drying really fast, the stamping worked perfectly using 'G'day Matte', but i did work really quickly so it would transfer before drying.
piCture pOlish is available from a whole bunch of places. Make sure you check out the piCture pOlish website, you can order this polish direct from them for $10 AUD or you can have a look at their list of distributors.
This product was provided for review. This is my personal, unbiased opinion.
For more information, see my disclosure policy.
For more information, see my disclosure policy.
Wednesday, June 12, 2013
Monroe - piCture pOlish (& a mini comparison)
Hi!
I hate when I don't post for a whole week! And I am sorry. Trouble is, at the moment I am posting what I wear and I haven't been wearing much so I have nothing spare to post. My exams start on Monday so polish has been staying on me for about 5+ days then I'll go naked for a couple of days and start again from there. Anyway, something that I'm glad I got to wear for as long as possible is piCture pOlish 'Monroe'. 'Monroe' is part of the Opulence collection.
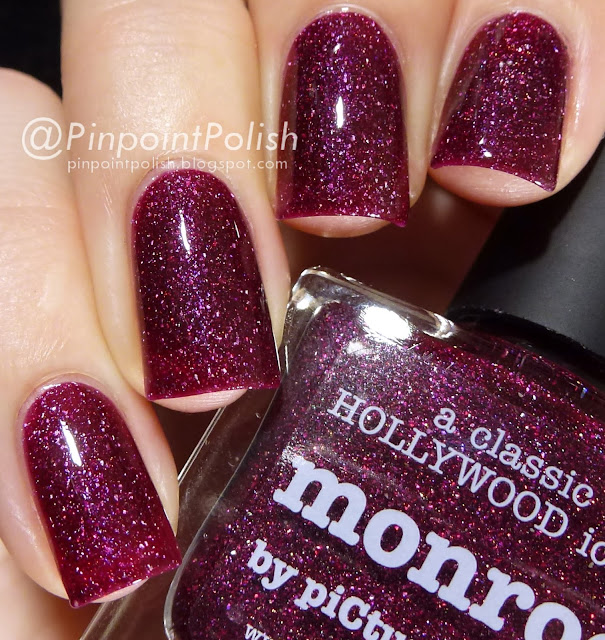
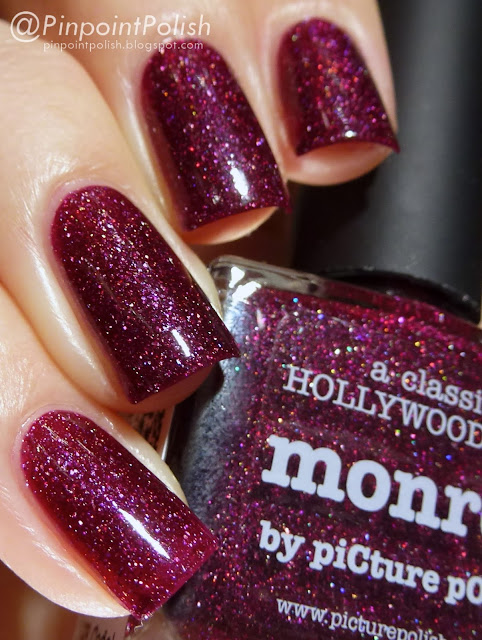
Of all the piCture pOlish shades I've shown you so far, this is absolutely one of my favourites. That is a big call to make because I have really really loved pretty much all of them so far. These two photos show 'Monroe' in direct light (top) and in slightly less direct light (bottom). In bright light the holo particles, that I seem to constantly go on about, really come alive, but in less direct light, the depth of the burgundy is apparent.
'Monroe' is the most beautifully rich red wine colour. So incredibly elegant. I just wanted to get all dressed up while I was wearing this, but alas, I am wrapped up warm in a onesie studying ;) I love how the holo has the red undertone of the polish. It really glows - you can see in this photo on my index finger.
I just thought I'd pop this in here. On my pinky and middle fingers is the original 'Monroe' that piCture pOlish released before this reformulated version. When I heard they were remaking 'Monroe' I knew I had to get the original. It was the first piCture pOlish I ever owned and I love it as much today as the moment I got it. It is very different as you can see. The original version is a bit more red and the holo is totally different and much more subtle. If you have the original, I would definitely recommend getting the new version too. It is as gorgeous, but in a whole different way. For this photo, I have 3 thin coats on my pinky and 4 thin coats on my middle finger. You can see how much redder it is with one less coat.
'Monroe' was, as usual, really nice to apply. This is another one of the slightly more opaque ones and 2 coats gives perfect opacity.
piCture pOlish is available from a whole bunch of places. Make sure you check out the piCture pOlish website, you can order this polish direct from them for $12 AUD or you can have a look at their list of distributors.
This product was provided for review. This is my personal, unbiased opinion.
For more information, see my disclosure policy.
For more information, see my disclosure policy.
Labels:
Burgundy
,
Holographic
,
Picture Polish

Wednesday, June 5, 2013
Peacock - piCture pOlish
Hey hey!
How are you all? I have another piCture pOlish to show you today. This time, I have 'Peacock'. I wasn't sure about this polish at first, but it has grown on me... Let's have a look at the pictures.
'Peacock' has a dark plum/purple jelly base and is pretty packed with glitter in green and what I think is silver. The "silver" glitter may be a pale pinky purple, but I can't work out if that's due to the the purple base or not.
I decided to try one coat of 'Peacock' over a few different colours. Left to right we have it over a-england 'Camelot', piCture pOlish 'Cosmos', OPI 'No Room For The Blues' and China Glaze 'Sweet Hook'. I quite like 'Peacock' over 'Cosmos' because the jelly base allows the amazing particles of 'Cosmos' to add to the intrigue of this polish. In saying that though, I do kind of like it over the two paler colours too. What do you guys think?
'Peacock' was really easy to work with. It is absolutely packed full of particles. The top photos show 3 thin coats of 'Peacock' on its own and as I mentioned, the last photo shows one coat over each polish.
piCture pOlish is available from a whole bunch of places. Make sure you check out the piCture pOlish website, you can order this polish direct from them for $12 AUD or you can have a look at their list of distributors.
This product was provided for review. This is my personal, unbiased opinion.
For more information, see my disclosure policy.
For more information, see my disclosure policy.
Labels:
Glitter
,
Picture Polish

Sunday, June 2, 2013
Black & White Watermarble
Hi lovely people!
I have so so much going on with uni work at the moment so this will be a short sweet post. I did a water marble a couple of weeks back and lets just say it was not the easiest time I've had. It was a really cold night and I couldn't make any of my polishes that are usually fine work. Anyway eventually this happened...
I can't even tell you how many polishes I tried the night I did this. It looked as though some polish explosion had happened afterwards though, as there were bottles of polish EVERYWHERE! In the end I had to go back to my trusty a-england 'Camelot' and OPI 'My Boyfriend Scales Walls' and this time I added INM 'Northern Lights' to the mix. I also put a layer of 'Northern Lights' over the top of everything too to give a teeny bit more sparkle.
Overall I don't think this came out too bad. Lots of people seemed to like it, but I just knew how much trouble it was, so for that reason alone I couldn't love it too much... Anyway, hopefully next time I have a little more luck.
Labels:
a-england
,
Black
,
Holographic
,
INM
,
OPI
,
Water Marble
,
White

Subscribe to:
Comments
(
Atom
)


