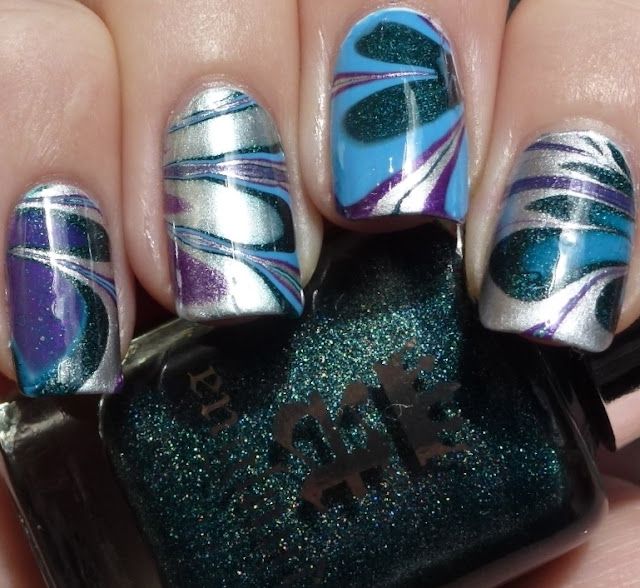
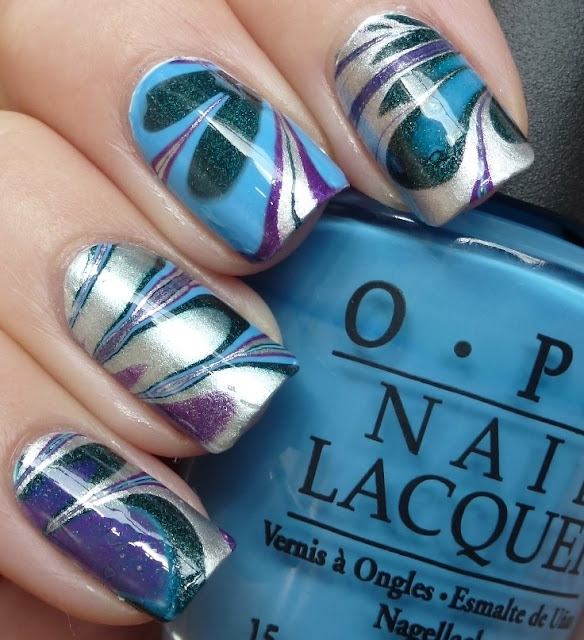
Here it is! I used three of my gorgeous a-england polishes - 'Saint George', 'Excalibur' and 'Avalon' - and OPI 'No Room For The Blues'.
I came up with this colour combo in the middle of the night the other night and I think it was pretty cool. I want to try a bit more subtle water marble in the near future, but I do love how this one looked. 'Excalibur' tended to spread further than the others so that's why the silver is a bit more prominent in 2 of my fingers.
You can see what I mean about the silver spreading in these photos (plus I just love the look of the bullseye! So pretty). A handy tip I picked up from LTHP was to use a smaller glass so that you can get a tighter bullseye with less polish, though in saying that I didn't actually end up doing a tight bullseye at all.
There's a couple of kinks that definitely need to be ironed out. I'm not 100% sure why, but I got a few bubbles. I have actually since found a pretty awesome little tips and tricks post from Lacquerish that may explain this little problem. Like I said earlier, I am definitely going to be giving this technique another go soon, hopefully with a bit more finesse thanks to the things I've learned! It was so much fun, albeit very messy!
You can see what I mean about the silver spreading in these photos (plus I just love the look of the bullseye! So pretty). A handy tip I picked up from LTHP was to use a smaller glass so that you can get a tighter bullseye with less polish, though in saying that I didn't actually end up doing a tight bullseye at all.
These are the designs on my thumbs. I didn't really get fantastic pictures of them, but you can certainly get the idea. My thumbs ended up being some of my favourites! Both of my thumbs some how came out with perfect little french tips in silver on my right thumb (see the left side of the top pic) and in purple in my left thumb (the right side of the bottom picture) - please excuse the tip wear, I got called into work last night and they got a bit thrashed!
Just because this is a post about my first marbling attempt, I thought I'd better pop in a photo of the actual first finger. This is on my left hand (hence it not being in the other photos) but it's kind of cool. Very different to the more flower sort of designs on most of my right fingers.
So what do you guys think? I had so much fun doing this mani and I can't wait to try some other exciting techniques. Anyone with any tips or suggestions about how to avoid pesky water bubbles, please let me know in the comments section! One other small problem I had was with top coat. Every single one of my top coats except one, Essie's 'Good To Go', made the polishes go all blended and cloudy. Particularly 'Saint George' would tend to mix with both 'Excalibur' and 'No Room For The Blues'. Curious, but luckily I tried my other top coats on my left hand fingers and thumb before doing anything on my right fingers :)


maybe just wait longer to add to coat? I tend to use thick top coats like seche vite so I rarely have smearing issues. I've found that Orly Glosser and Revlon Quick Dry smudge lacquers like crazy, even if they seem to be dry.
ReplyDeleteThis is such an amazing first attempt, I have to get back on the water marbling wagon again, it's the mess that always puts me off, plus i'm really bad at picking colour combinations!!!! Your's is so pretty!!!
Thank you so much! Yea I left it actually around an hour or so before I put top coat on for most of my nails. Bit weird. All good though, at least Good To Go worked perfectly! I think I'm addicted! It was so much fun.
DeletePS Hope Auckland's treating you well and your exams went well! :)
Your marble turned out beautifully! Have you seen all of the tutorial videos from Colette at My Simple Little Pleasures? She's amazing and does great designs, she convinced me to try marbleing!
ReplyDeleteThank you!
DeleteAbout a year ago I watched around a million tutorials videos, I can't remember them all but I definitely have watched some things from My Simple Little Pleasures. I love all the fantastic YouTube tutorials out there! I'd be lost without them!
This is gorgeous! I can't believe this was your first marbling attempt :) From my experience, even if you do get bubbles or especially droplets of water... use a kleenex and with the very tip of one corner, touch it to the drop of water. It will draw the water out and 9 times out of 10 will leave your polish the way it was without smudging it.
ReplyDeleteThank you! And thanks for that tip too. I read something like that this afternoon. Will give that a go next time. Good to hear that it actually works though! Yay I can't wait to try it again now, hopefully bubble free :) Thanks again!
DeleteWhat an incredible first try! Followed instantly haha
ReplyDeleteOh thanks Kelli! :)
DeleteThis looks amazing Anneke! I've tried watermarbling several times and it has NEVER looked this good! Awesome job! :)
ReplyDeleteThank you! That's so kind! I'm sure yours look amazing! And who knows... This may have been a case of beginners luck ;)
DeleteWOW! Your first water marble is soooo pretty! Well done!!!!!
ReplyDeleteThanks Marta :) x
DeleteOh my god, this looks so cool! How do you do it? I'd like a step by step instruction video...Kidding! LOVE IT!
ReplyDelete