Showing posts with label Black. Show all posts

Monday, August 25, 2014

piCture pOlish Blog/Insta Fest 2014!!

I'm so excited to be part of piCture pOlish Blog/Insta Fest 2014! This year Blog/Insta Fest is made up of 2 parts so let's get started with part 1…


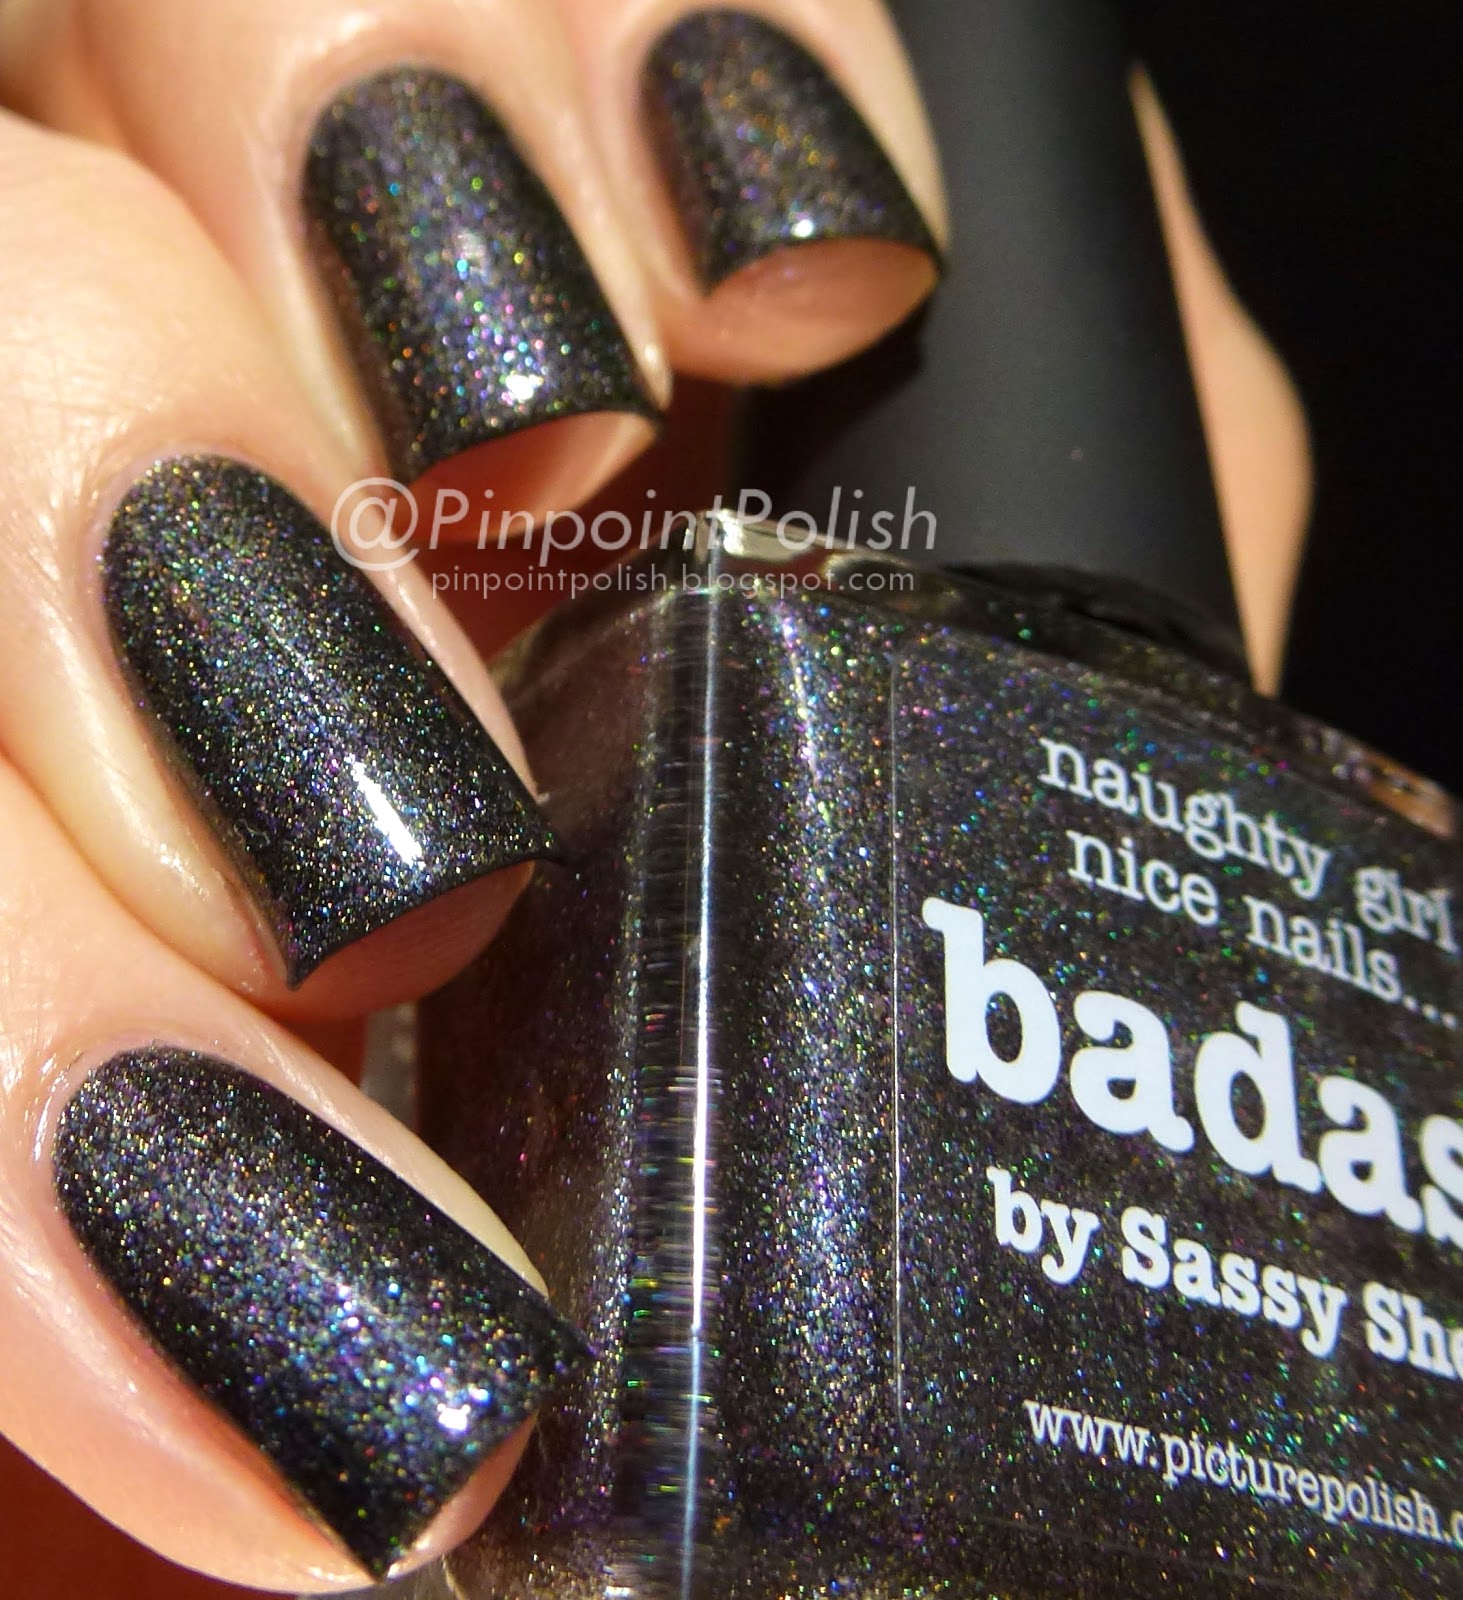
Badass, picture polish, swatch

Badass, picture polish, swatch
First up I have a gorgeous shade to show you that was made in collaboration with Sassy Shelly called 'Badass'. We all know how much I adore holos and so it shouldn't come as a surprise that I really like this polish. 'Badass' is a beautiful scattered holo with a black base - I love how black the base is without hiding the holo effect too much at all. To make matters better, the formula is great too. As is the usual story with piCture pOlish polishes, this had great opacity with 2 coats being perfect.


The next part of Blog/Insta Fest is to celebrate not only some more wonderful piCture pOlish shades, but also Nail Vinyls that have just started being stocked there.


picture polish Hot lips Honeydew, chevron nail vinyls
This is the look I came up with using piCture pOlish 'Hot Lips' and 'Honeydew' along with the chevron design from Nail Vinyls. I have a quick step by step of how I made this look.


Starting with a white base, I placed the nail vinyls where I wanted them with one small area and one large area on each nail. I painted 'Honeydew' just in the small section and immediately peeled up the vinyls. Next, I top coated to speed up the drying time of everything.


Next up I placed the vinyls right on top of the green and painted 'Hot Lips' on the large area of my nails and peeled up the vinyls immediately again. I actually repeated that step again to make the pink a bit more opaque. Again, wait for everything to dry completely and place some vinyls on top of the pink right against the green. Place another vinyl to leave a really thin gap and then another after a slightly larger gap (see the bottom pic there). Paint these bits white and then once dry place vinyls either side of the larger white stripe and paint with 'Honeydew'.


picture polish Hot lips Honeydew, chevron nail vinyls
Et voilà. Top coat to seal everything in and you're done. I really love how this turned out - these colours go so perfectly together and they take me right back to the fashion of my childhood (does anyone else remember slouch socks and hair scrunchies?). It does require a little patience while each layer dries but it's totally worth it in my opinion.

A couple of tips for working with the vinyls - from my experience it is absolutely best to peel them off while the polish is still wet, also I found that if I stuck them down too hard they would leave a slight gluey residue (they are plenty sticky so you don't need to press them hard). Overall, these vinyls are a nail art must have! They make nail art so easy and you can make some really striking nails with relatively little effort.

Now to the important details - where can you get your hands on all these things? piCture pOlish is available from a lot of places all around the world and of course from them direct from Australia. Pop over to their network page to find where is closest to you. piCture pOlish always has really great deals which you can see on their Every Day Deal page too.

Nail Vinyls are available from them direct with international shipping and of course from piCture pOlish too. piCture pOlish will be selling a special exclusive pack that includes Chevrons, Mini Chevrons, Straight and Right Angles which you'll be seeing used inBlog/Insta Fest this year :)

Make sure you follow Nail Vinyls and piCture pOlish to keep up with all their latest news and info.

Wednesday, July 16, 2014

Girly Bits - Into The Night

I have an oldie but a goodie to show you tonight. A polish that I've had for a long time now, I think this was one of my earlier indies, this is Girly Bits 'Into The Night'


Girly Bits, Into The Night, a-england Perceval, swatch

Girly Bits, Into The Night, a-england Perceval, swatch

Girly Bits, Into The Night, a-england Perceval, swatch
This is such a beauty. I have 2 coats of 'Into The Night' over top of a-england 'Perceval'. This polish is often put over various dark colours and it looks wonderful, but this is my most favourite combination. It makes the most beautiful blackened red, and then with those holographic particles… MMMMMmmmmm. Such a seductive combo - can I even say that about 2 nail polishes and have it make sense?


As I mentioned, I used this polish as a topper using 2 very thin coats which is how I like to use it. The blackened base is fairly sheer though just giving a black cast to whatever it is layered over if thin coats are used. It can be built up to full coverage with more coats. The holographic glitters are packed in to the polish and so apply really easily to the nail.


Girly Bits polishes are available through a number of websites so make sure you check out this list of distributors to see which ship to your location. You can follow Girly Bits on Facebook, Twitter, Instagram and Pinterest to keep up with the latest news and swatches etc and of course the Girly Bits blog too. 'Into The Night' is currently in stock on the Girly Bits website at the time of writing this post so hop over there and grab it.
Thursday, January 23, 2014

2 Year Blogiversary Mani

Hi hi!

As you know (if you saw my last post), my 2 year blogiversary has just been. I posted that day, but I hadn't had time to do anything particular on my nails at that point. I wanted to do a little 2 year anny mani for it, so that's what I am posting today. First up though, I just want to thank all you lovely people again for reading my blog, and commenting etc, and also thanks to the truly wonderful friends that I've made along the way. This blog is my little escape from studies and work and all those things and it is made just that much better by the interaction that I have with fantastic people from all over the world.


Cult Nails Fetish, a-england Encore Margot, Emily de Molly Dark Forces, stamping, studs

Cult Nails Fetish, a-england Encore Margot, Emily de Molly Dark Forces, stamping, studs
I really love how this mani came out. It is using a whole lot of products that I love which is perfect for this 2 year anny mani :) On my index and pinky fingers I used 1 coat of a-england 'Camelot' followed by 2 coats of Emily de Molly 'Dark Forces'. On my middle and ring fingers, I used 2 coats of Cult Nails 'Fetish'. My ring finger has a stud design using studs from Born Pretty Store. My middle finger is stamped with a-england 'Encore Margot' from the Ballerina collection and MoYou plate 05 from the Pro collection.

I won't get into formulas etc as most of these polishes have been reviewed previously on my blog - long story short, all of these polishes are wonderfully opaque, easy to use and they also wear remarkably well (even without top coat on 2 of my fingers).

Make sure you check out all the links to the stores of everything I used as they all make brilliant polish, plates and accessories!

Thanks again lovely readers xx

Monday, December 23, 2013

Polished By KPT - Dark Angels & Liquid Gold

Press Sample

Hi!

I have the last 2 Polished By KPT polishes to show you today. I have one foil chrome effect polish and one holographic effect polish. First up 'Liquid Gold'.


Liquid Gold, Polish By KPT, swatch

Liquid Gold, Polish By KPT, swatch
'Liquid Gold' is a gorgeous pale, almost champagne gold colour and it is full of more yellow gold irregular flakes. I tend to stay away from gold polish mostly because I am so pale, but still with yellow undertones so I don't suit a lot of golds (though I only wear gold jewellery… weird…), but this one is light enough that it was really pretty. I like how the flakes give the polish a sort of gilded effect, it's so Christmassy to me.


Dark Angels, Polished By KPT, swatch

Dark Angels, Polished By KPT, swatch
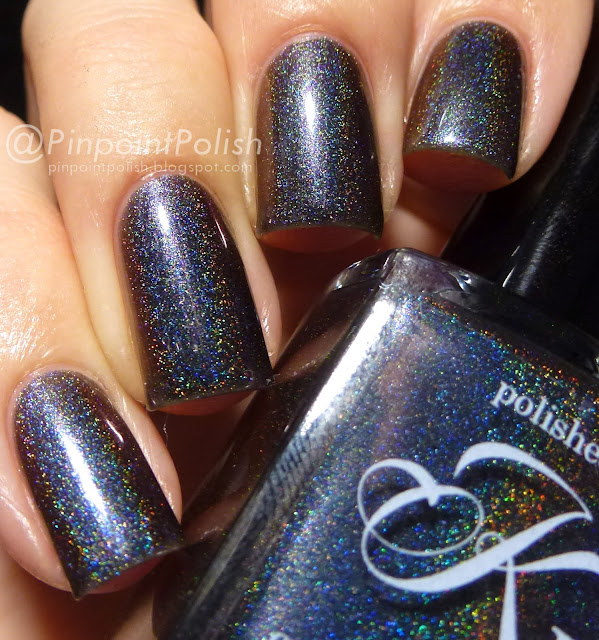
Now for a real favourite of mine! This is 'Dark Angels' and it is a holographic beauty. When I first opened up my parcel from Katherine, I saw this and knew I'd love it - dark + holographic is always going to equal love for me - but it was once I put it on, I got a pleasant surprise. At certain angles, there is a slate/blue look to this polish, then on extreme angles it shines red! I love that this is so much more than a black holo, basically I love a polish that can surprise me.


Both of these were, as usual, easy to apply. I used 3 coats for both. 'Dark Angels' was a little thicker (not at all in a bad way), so potentially if you use thinner coats than I did, you may need 4 coats. 'Liquid Gold' was also perfectly smooth after one normal coat of top coat.


Polished By KPT polishes are available direct from Katherine's Big Cartel shop if you're in the USA. For those international people, check out this 'where to buy' tab. All polishes are 3-free and not tested on animals.


MERRY CHRISTMAS EVERYONE!


These products were provided for review. This is my personal, unbiased opinion.
For more information, see my disclosure policy.

Monday, October 7, 2013

Opium - Takko Lacquer


Press Sample

Hi lovely people!

I have been drowning in uni work (and still am) so I haven't had much time for nails, which is pretty sad, but tonight I have the last of my latest Takko Lacquer polishes to show you. It is a beauty, but what do you expect? This is Takko Lacquer 'Opium'...


Opium, Takko Lacquer, swatch
This is another complex polish by Takko Lacquer. This picture is sort of a summary of 'Opium'. It has a black base and is absolutely packed with shimmer that shifts from red through to green.


Opium, Takko Lacquer, swatch

Opium, Takko Lacquer, swatch
Here's the red side, which is probably the colour that I see the most in indoor lighting. Check out the glow of the red in the top picture on my pinky. It's like FIRE! The bottom picture here is how it would usually look in lower light with realy blackened edges. YUM.


Opium, Takko Lacquer, swatch

Opium, Takko Lacquer, swatch
'Opium' appears bright green at certain extreme angles. It's so gorgeous when it catches your eye. Such a mysterious, vampy polish with it's shift.


I'm sure you are not surprised to see that I'm once again seriously impressed with this Takko Lacquer polish. It was really easy to apply, but was ever so slightly sheer. I used 4 reasonably thick coats for full opacity. I think it needs to be as sheer as it is though, because that's what allows the shimmer to show through so stunningly.


Make sure you check out Sheryl's blog to find out about the inspiration behind her polishes, along with other updates. Also keep an eye on Takko Lacquer's twitter for info about restocks. Takko Lacquers are sold from their own shop, but only with US shipping. For us international ladies, Takko lacquers are stocked at LlaroweMei Mei's Signatures and Edgy Polish.


This product was provided for review. This is my personal, unbiased opinion.
For more information, see my disclosure policy.

Wednesday, June 19, 2013

G'day Matte - piCture pOlish

Hi guys!

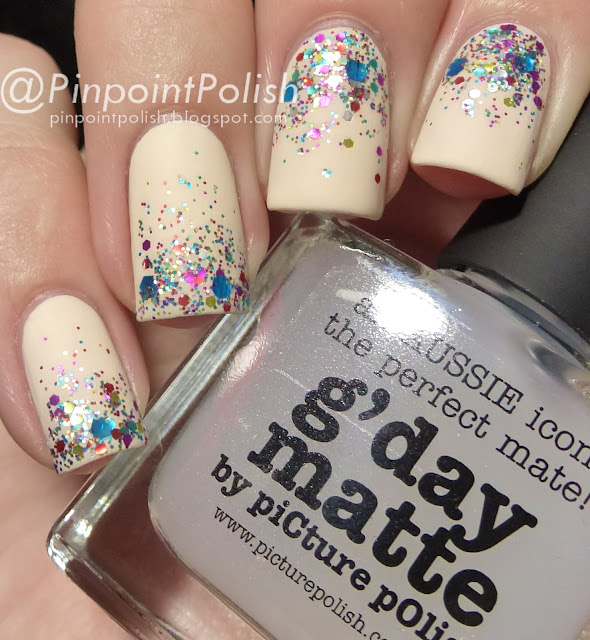
I am sad to say that my piCture pOlish review series is coming to a close today! I've really loved all of the polishes that I got to show you. I have a pretty awesome polish to finish on. This is their fairly new matte top coat, 'G'day Matte'. I absolutely love me some matte nails, but I haven't posted many on here because I have trouble making them look good. I have always used Essie 'Matte About You' and have always had a bit of trouble with it, but 'G'day Matte' is a whole different story. I love it.

One more thing, if you follow me on Instagram, you may have seen that I did a spot of hand modelling on the weekend for the awesome kiwi designer, Saben. We got our nails done by the lovely Leah Light and her team. It was heaps of fun, but they needed us all to have almond shaped nails. As you know, I keep my nails very square usually. I have started to head back that way, but they are very short (especially at the sides) so bear with me while I grow them back to my usual square shape :)

Anyway onto 'G'day Matte'...


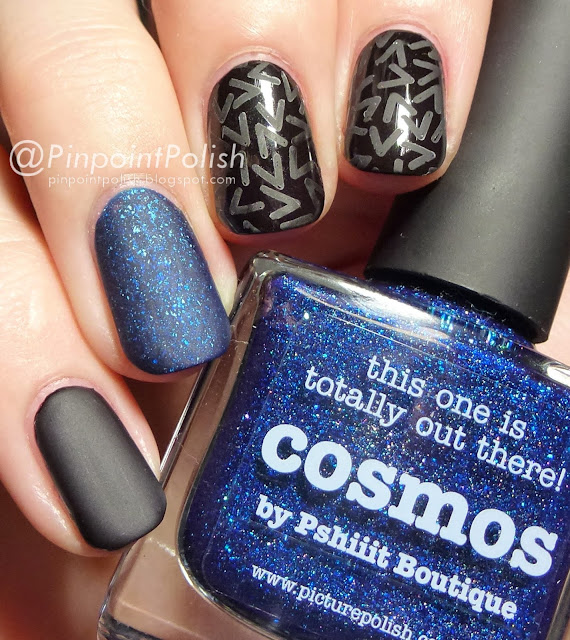
Picture Polish G'day Matte, Cosmos, a-england Lancelot

Picture Polish G'day Matte, Cosmos, a-england Lancelot
So here's the bottom line. 'G'day Matte' is amazing! It is so incredibly forgiving and is so so so easy to use. I don't care how who you are, you will be able to rock this baby! Look how pretty it is over 'Cosmos'. Love it - I don't know what else to say. I used 'LeaLaC XL - B' stamping plate and I used a-england 'Lancelot' and, of course, piCture pOlish 'Cosmos' as the bases.


Picture Polish G'day Matte, Cosmos, a-england Lancelot
Déjà vu anybody? When I did my mani with piCture pOlish 'Blogger', I mattified it and, holy moly, it looked cool. I've never ventured into the land of matting glitter before, but I'm thinking this won't be the last time.


So I already said that the formula is amazing. As I said, it is incredibly forgiving. Absolutely zero trouble at al. It levelled out perfectly and as usual with a matte top coat, dried really fast. Speaking of drying really fast, the stamping worked perfectly using 'G'day Matte', but i did work really quickly so it would transfer before drying.


piCture pOlish is available from a whole bunch of places. Make sure you check out the piCture pOlish website, you can order this polish direct from them for $10 AUD or you can have a look at their list of distributors.


This product was provided for review. This is my personal, unbiased opinion.
For more information, see my disclosure policy.

Sunday, June 2, 2013

Black & White Watermarble

Hi lovely people!

I have so so much going on with uni work at the moment so this will be a short sweet post. I did a water marble a couple of weeks back and lets just say it was not the easiest time I've had. It was a really cold night and I couldn't make any of my polishes that are usually fine work. Anyway eventually this happened...


I can't even tell you how many polishes I tried the night I did this. It looked as though some polish explosion had happened afterwards though, as there were bottles of polish EVERYWHERE! In the end I had to go back to my trusty a-england 'Camelot' and OPI 'My Boyfriend Scales Walls' and this time I added INM 'Northern Lights' to the mix. I also put a layer of 'Northern Lights' over the top of everything too to give a teeny bit more sparkle.


Overall I don't think this came out too bad. Lots of people seemed to like it, but I just knew how much trouble it was, so for that reason alone I couldn't love it too much... Anyway, hopefully next time I have a little more luck.

Wednesday, May 1, 2013

Starry Night - piCture pOlish

It's Wednesday again and that means it's piCture pOlish time! It was hard to wait for Wednesday to roll around again to show you another of their beauties! Anyway, enough chit chat... This is another collaboration polish and this time the collaboration was with the wonderful Leah Ann from Llarowe. I'm sure you all know about the online shop that is Llarowe and if you're anything like me, you have probably spent more time and money there than you care to admit, trying to get your mitts on so many wonderful indies.


Starry Night, Picture Polish, Llarowe, swatch

Starry Night, Picture Polish, Llarowe, swatch
I love me a good dark polish and piCture pOlish have done it again, yet another polish I love. I am quite deathly pale with really dark hair and so I often shy away from black polish, but with the addition of the scattered holo effect and the jelly formula of the polish, I found 'Starry Night' really wearable.


Starry Night, Picture Polish, Llarowe, swatch
In brighter light, you can really see how packed full of holo particles 'Starry Night' is and the slightly sheer jelly allows this to really shine through.


Starry Night, Picture Polish, Llarowe, swatch
A close up of the piCture pOlish holo shard particles that I simply cannot get enough of. In fact, I made a bold statement the other day while staring at my nails, I decided that I could be happy if I wore only polishes with this finish for the rest of my life. Luckily, in reality, this would never happen, but if for some reason I had to choose a single type of polish to use for ever more, I would be quite happy if it was one like this.


Just like with 'Ocean' last week, 'Starry Night' had a sheer jelly formula. I used 4 coats, but only because of the close up photos. Three easy coats gave full opacity and, as usual, that's how I wore 'Starry Night' on my left hand. I did try putting a single coat over a coat of black and at the end of the day, there wasn't a huge amount of difference. I actually preferred 'Starry Night' on its own, because it has that look of depth with the particles showing through the layers of polish and just an overall softer look about it. 'Starry Night' was really easy to work with formula-wise.


piCture pOlish is available from a whole bunch of places. Make sure you check out the piCture pOlish website, you can order this polish direct from them for $12 AUD or you can have a look at their list of distributors.


This product was provided for review. This is my personal, unbiased opinion.
For more information, see my disclosure policy.

Saturday, April 27, 2013

Sugar Spun Fetish - Cult Nails (with Sinful Colors & China Glaze)

I decided to do some major study avoidance earlier in the week and the best way to do that was to try the sugar spun technique. I had already been wearing (and loving) Cult Nails 'Fetish' and that seemed like it would work as the perfect base. Let's start with 'Fetish'...


Fetish, Cult Nails

Fetish, Cult Nails
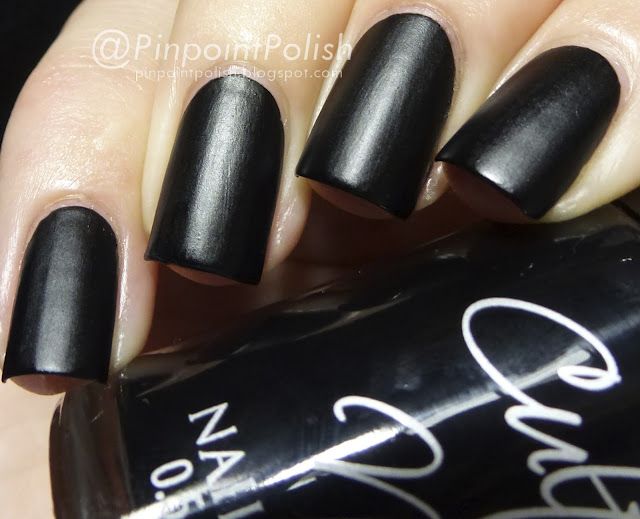
I have always loved the look of matte black polish but have never quite mastered using Essie 'Matte About You'. Lucky for me, Maria from Cult Nails created these wax finish polishes. I love that sort of rubbery waxy look of 'Fetish'. So different and pretty edgy if you ask me.


Fetsih, Cult Nails, Sugar Spun Nails mani, Sinful Colors, China Glaze
So here's my attempt at a sugar spun mani... I didn't top coat it because I think the texture of this is a big part of the look of it. Overall it went ok apart from that big old glob on my pinky nail. This was the last nail I did and I was gutted when I did that! Must have been rushing to get it finished. Oh well, I decided just to roll with it. The colours I used were China Glaze 'Splish Splash' and 'Surfin' For Boys' on my index and middle fingers and on my other two fingers I used China Glaze 'I'm With The Lifeguard' and Sinful Colors 'Dream On'.


'Fetish' was so easy to apply. I barely needed the second coat, as it's beautifully opaque. I had been a bit worried about the dry time seeing as you obviously aren't putting a quick dry top coat on top, but I was pleasantly surprised by how fast it dried. For the sugar spun technique I searched a lot of videos on YouTube and if you're wondering how to do it yourself, that's what I'd recommend. There are always lots of good tutorials. I think the main tutorial I used was one by xoxo Alexis Leigh.

Cult Nails polishes are available from the Cult Nails website for $12 USD.

Sunday, December 9, 2012

Parfait Day - Lime Crime & Putting On The Ritzzz! - Dollish Polish

I have another Lime Crime for you today. I have to say, the more I wear these Lime Crime polishes, the more I am so pleased that I got the set of them. I love them so much. They are fast becoming some of my most favourite polishes. Today's Lime Crime is 'Parfait Day' with a bit of Dollish Polish 'Putting On The Ritzzz!' for good measure.


Parfait Day, Lime Crime, Putting on the Ritzzz!, Dollish Polish, swatch
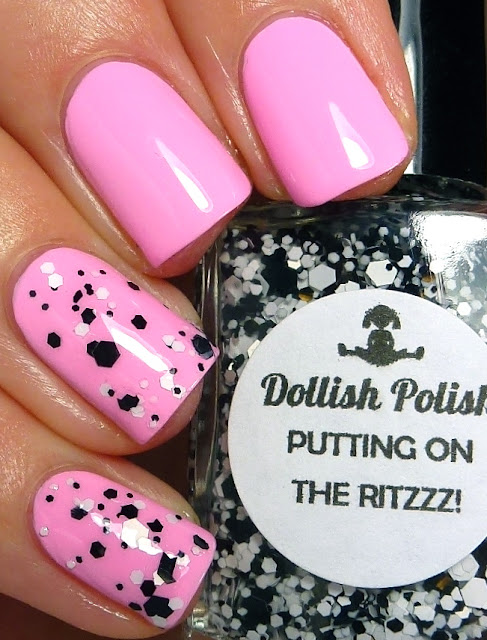
This polish is so bright and as usual with the Lime Crime polishes that I've shown you, it is pastel, but also verging on neon. The thing I love about 'Parfait Day' is that there's actually a slightly dusty feel about the pink which is unusual when it's so close to leaning neon.


Parfait Day, Lime Crime, Putting on the Ritzzz!, Dollish Polish, swatch
This photo shows a bit more of the neon side of this cotton candy pink. I think 'Putting On The Ritzzz!' worked really well with 'Parfait Day'. I got so many comments on this combination while I was wearing it earlier in the week.


'Partfait Day' applied just like the other Lime Crime polishes that I've shown you, it dries satiny and very fast. Like them, it was also really beautifully opaque, requiring barely two coats for perfect coverage. 'Putting On The Ritzzz!' was a bit of a tricky little bugger to apply, but nothing that a good mix and a bit of patience won't help. The first coat I applied of 'Putting On The Ritzzz!' didn't give very good coverage, but as you can see, with two not very thick coats, the coverage is good in the end.


Lime Crime's are available from Harlow & Co. (and remember they have free shipping with orders over $50USD) and 'Putting On The Ritzzz!' can be purchased from Dolly's Big Cartel shop. (keep an eye on her shop updates to see what will be in the upcoming restocks and when they'll be happening).

Wednesday, December 5, 2012

Polish Days: Bling

It's that time again... Polish Days time. To be honest with you, I thought I had till the 6th (which would be the 7th here in NZ and suddenly I realised that the 4th was the actual date, so late last night I got to it and came up with this...


Polish Days: Bling
It's not really at all what I had in mind for this Polish Days, but I think it turned out ok given that it was a bit rushed. I used a-england 'Camelot' as my black base and Sally Hansen 'White On' as the white base. On the pinky finger is a couple of coats of Chi Chi 'Disco Diva' (which does NOT want to sparkle properly on camera!) and on top of that on my index finger is a coat of Cult Nails 'I Got Distracted'. I also used my little gold studs from the Born Pretty Store and some sticky little gem things that I got from the scrap booking section at The Warehouse.


Well, hopefully next time I can be a little better organised for Polish Days. Also, just to finish this little post, I would like to say congratulations to Hannah from Polly Polish and to her Mr who got her the most GORGEOUS ring that could inspire this month's theme.

P.S. this is my 100th post! WOO. Thanks to everyone who reads my little blog :)

Friday, November 23, 2012

Milky Ways - Lime Crime & Tangled Web - CrowsToes

I have lost all track of time!! It never takes me long to be completely lost as to what day it is when I'm not studying. Anyway, I keep forgetting what days to blog. Maybe I should get in the habit of scheduling posts so I don't miss them. Anyways... I have another Lime Crime and glitter combo to show you today. This time, 'Milky Ways' with 'Tangled Web' on top.


Milky Ways, Lime Crime, Tangled Web, Crows Toes, swatch
I love this polish. The slightly peachy tone makes it stand out from your usual nudey, cream polish. I really needed a bit of a palate cleanser as I had just removed a blue polish that stained worse than I've ever experienced before and 'Milky Ways'  was perfect for the job.


Milky Ways, Lime Crime, Tangled Web, Crows Toes, swatch
'Tangled Web' was one that I thought looked kind of interesting from CrowsToes halloween collection and I just bought on a whim. It has ended up being one of my favourite glitters. It's so simple but the mix of black and blue and the sizes just seem to work so well together. The blue really catches the light and sparkles like crazy. It's so eye-catching.


I used 3 thin coats of 'Milky Ways' but I think if you use thicker coats or if you're really careful with application you may be able to get it down to two coats. As with the other Lime Crime polishes, it dries really fast so you need to work fairly quickly. It also dries to a satiny finish, so top coat really makes it come alive. I used just one coat of 'Tangled Web' and it's application was really easy. There is a lot of glitter in there so you can control the coverage quite well.

I bought my Lime Crime polishes from Harlow & Co (don't forget that there's free shipping over $50USD) and I bought 'Tangled Web' from Llarowe (I have just checked and it is still available, though I don't think it will be for much longer being that it was a Halloween polish).

Sunday, November 18, 2012

Tristam - a-england, with a Side of Stamping and Dots

Hi!

I have a little mani to show you that I did a fair while ago. If you follow me on Twitter or Instagram (@PinpointPolish), you will have seen this while it was in progress. Basically this is inspired by a book, a recipe book to be exact. Weird I know, it's a long story, but basically it is black with white text on it and a big silver circle. This is a pretty abstract take on it, but I loved how it turned out.


For this mani I used a-england 'Tristam' and 'Bridal Veil' for the bases. For my ring finger I used Konad Special White for the stamp (BM-311) and for the dot gradient I used a-england 'Excalibur' and Rescue Beauty Lounge 'IKB:2012' (over white dots).


I love 'Tristam' so much! I really need to take some proper photos of this bad boy in all it's glory. It's such a gorgeous inky blue verging on blurple. So pretty! This was one of my first a-england loves! It is just the perfect shade of blue to me!


As usual, 'Tristam' and 'Bridal Veil' had that brilliant a-england formula that we have all grown to love. I used two coats of 'Tristam' and just one coat of 'Bridal Veil'.


a-england polishes are available from their website and are £9 with free shipping worldwide.

Wednesday, November 7, 2012

Polish Days: MAN-icure


My first Polish Days! I'm very excited to have finally joined up with this awesome idea. This months theme is MAN-icure in tribute to Movember. I instantly knew what my MAN-i would have to be, as it is something that I get teased about loving, due to its manly nature (according to my friends). One of my big loves in life is Formula 1, namely Sebastian Vettel.


Formula One Nails, Polish Days
For those of you that don't know, Vettel is the current world champion, having won the championship for the last two years in a row, so he is car number 1. The 1 on my ring finger is the one on his RB8 (car) this season. The water marble is taken from the Red Bull colours (his team).


This is a quick snap of my Red Bull cap. Unfortunately I got this before Vettel won the championship the first time so it has number 5 on it. Anyway you can see the colours of the team there nicely.

The final MAN-i that you have just seen was actually attempt number two... I originally wanted the bright yellow from the nose cone of the RB8 in the water marble, but it didn't quite work as I had wanted...


Formula One Nails, Polish Days
As you can see, the colours all sort of muddied together. Much as I don't hate this, I am glad I redid the two nails. I love how the F turned out in the top one anyway.


I used a whole lot of polishes for this MAN-i...
a-england - 'Excalibur' & 'Camelot'
OPI - 'Red Lights Ahead... Where', 'I'm Not Really A Waitress', 'Yoga-Ta Get This Blue', 'No Room For The Blues', 'The 'It' Color'
Nicole by OPI - 'Listen To Your Momager'
Sally Hansen - 'White On'
Konad - Special White

If you have any questions about what I used where, please leave a comment and I'd be happy to tell you more :)

For the middle finger I used LeaLaC XL - B stamping plate and for my ring and pinky finger I used striping tape to get all the lines nice and straight.

I had lots of fun doing this MAN-i and it actually served as the perfect distraction to take my mind of the pain in my tummy while I was sick :)

If you want to sign up for the next Polish Days, hop over to Polly Polish for information.

Tuesday, October 23, 2012

Sneeze Breeze - The Hungry Asian

I am currently DROWNING in exam study so the next few posts might be a little shorter. Also I have a problem child right now, by way of my middle finger on my right hand (the one you see) that has decided to have the peeling tantrum of all time and started to grow out a bit weird. So today, I've had to chop them all! Shortest they've been in years. It feels so strange to feel my fingertip above my nail! Oh well, a bit of TLC and hopefully they'll be up and growing in no time.

Today I have the wonderful 'Sneeze Breeze' from The Hungry Asian...


Sneeze Breeze, The Hungry Asian, swatch
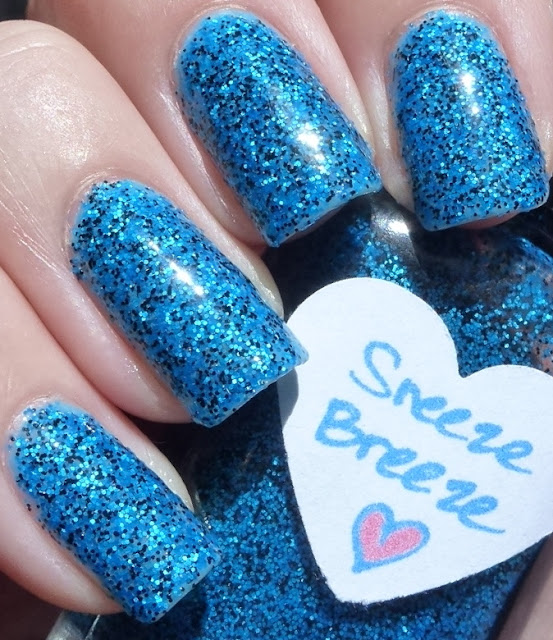
'Sneeze Breeze' is a mixture of blue and black matte glitter in a clear base. So simple and yet absolutely freaking amazing!


Sneeze Breeze, The Hungry Asian, swatch

To me, 'Sneeze Breeze' is like summer in a bottle. It's so vibrant and happy looking. I love it. As you can see, it's quite dense. I used two pretty thick coats and it was fairly opaque, but I have one coat of OPI 'No Room For The Blues' (speaking of gorgeous polishes) underneath.


This also happened to be the first time I tried using PVA glue as a base coat. This is such a genius idea and I love whoever thought of it! If you want to read more about PVA glue as a base, hop on over to Lab Muffin or Pretty Purple Polish. I'm not sure who originally came up with this idea (if anyone knows, please let me know so I can put a link), but I looked at the two blogs that I've linked. Also the lovely Kirsten from Glitta Gloves gave me some handy hints on Twitter (thanks!!). Anyway, all in all, the PVA glue as a base coat thing was a HUGE success!! So easy and makes me want to wear glitter every day of my life. Granted, I don't think the wear time was as good as normal for me personally, but it just means I can effortlessly change my glitter more often :) (and when I say not as good, it still happily lasted a couple of days, so not bad at all).


For those of you who haven't seen it in action, this is what it looks like when peeled. The first hand broke up a lot, but the second hand I just ran under warm water for a minute and they peeled off so easily in one piece (going from the cuticle end always).

Thursday, October 4, 2012

Jane Eyre - a-england

It's that time again... Time for another a-england Gothic Beauty. Todays beauty is 'Jane Eyre' and a beauty she is (but then would we expect anything less from Adina?)... I'm just going to get right on with the photos.


Jane Eyre, a-england Gothic Beauties, Swatch
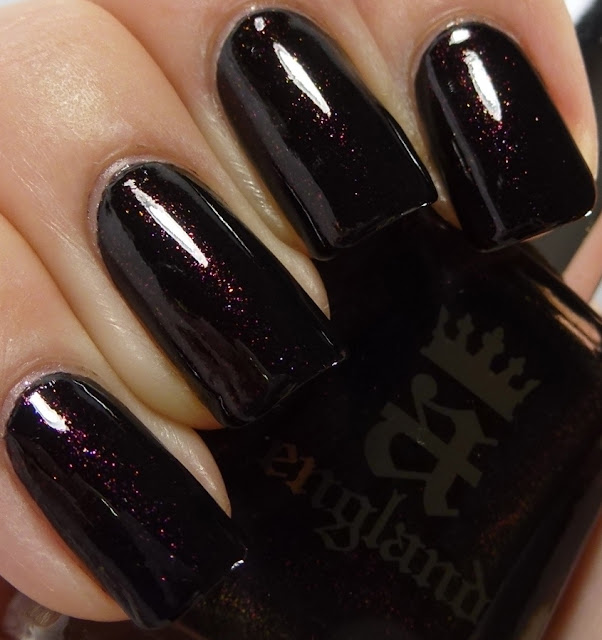
In the same style as 'Lady of Shalott', 'Jane Eyre' has a black base, but this time with pinky red shimmer absolutely piled into it. I originally saw the bottle and thought, oh yeah red shimmer, but now I can't decide what colour it is... Red? Pink? Pinky-purpley-red? Who cares? All that matters is that it's gorgeous.


Jane Eyre, a-england Gothic Beauties, Swatch
Also following in the footsteps of 'Lady of Shalott', there is a colour shift in 'Jane Eyre's' shimmer. This time it's a shift to a copper/bronze.  You can also see the more red shine to it on my middle finger.


Jane Eyre, a-england Gothic Beauties, Swatch
'Jane Eyre' has a very blackened side to her in certain light, but I just love the depth that the shimmer gives her. The coarse shimmer gives these Gothic Beauties such a beautiful depth.


Jane Eyre, a-england Gothic Beauties, Swatch
This is kind of a nice summary photo of 'Jane Eyre'. At the top, you can see the black veil that she often wears, but then you move down to the pinkie finger and you can see all the colours in the shimmer (yes you are seeing purpley-blue)!

I've said it before and I'll say it again, I love a-england polishes. Each one I wear makes me fall just a little further in love with them. Whether you want something brooding (any of the Gothic Beauties), something clean, something holographic... well you get the point. These Gothic Beauties are so complex and there is something so enchanting about them. Once again, the formula was fool-proof. Two easy coats for full opacity. The shimmer is fairly course so I used two thin coats of top coat, but it really is a small price to pay, believe me.

The Gothic Beauties are available now from a-england with free worldwide shipping :)