Showing posts with label OPI. Show all posts

Monday, June 23, 2014

a-england - Excalibur Renaissance

Press Sample

Hi!!

I've finished exams! YAHOOO. Although I am not having a break, it is nice to be back in the lab and be able to come home in the evening and relax a bit (and do my nails). I have an a-england to show you today which will most likely be a bit of an old friendly face despite this being a new release. Excalibur was originally retired and revamped (you can see that version here), but recently 'Excalibur Renaissance' was released.


Excalibur Renaissance, a-england, swatch

Excalibur Renaissance, a-england, swatch
'Excalibur Renaissance' is a gorgeous platinum/silver metallic foil polish. This is quite a striking polish when worn as a full mani. It seriously catches the light in the most eye-catching way. Gorgeous. This is very similar to the original 'Excalibur', but to my eye the shimmer is a little finer. I think that makes this polish a little smoother and less brush strokey than the original.


Excalibur Renaissance, a-england, OPI Manicurist of Seville, MoYou Artist 01
My favourite way to use 'Excalibur' has always been as a stamping polish as it's so darn opaque. 'Excalibur Renaissance' lived perfectly up to my expectations and stamped just as easily as its predecessor. Here, I have stamped using 'Excalibur Renaissance' and MoYou plate 01 from the Artist Collection - underneath is OPI 'Manicurist of Seville'.


Overall, this polish was up to the usual high a-england standard as far as formula goes. Opacity is ridiculously good with one coat being super opaque. The only thing is that a little care needs to be taken  to minimise brush strokes, but it's not too bad.


a-england polishes can be purchased from a lot of places around the world. Unfortunately, you can only order direct from them if you are in the UK, but be sure to check out their list of worldwide distributors to find a place close to where you live. You can also follow a-england on TwitterFacebook and Instagram to keep up with the latest news from them.


This product was provided for review. This is my personal, unbiased opinion.
For more information, see my disclosure policy.

Saturday, June 14, 2014

I'll tumble For Ya - Dollish Polish (+ Gradient)

Hello!!

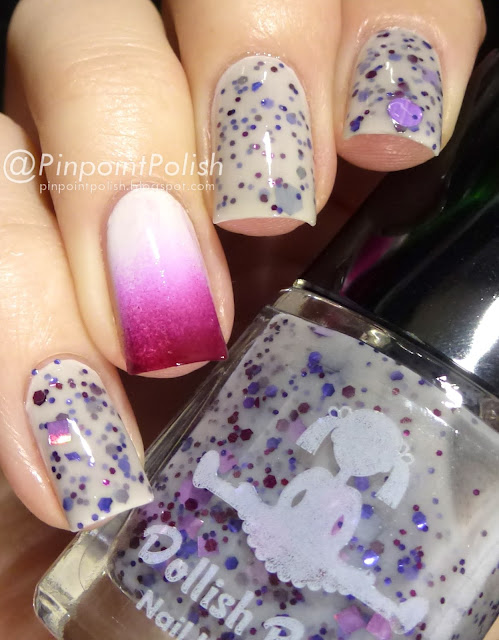
I'm half way through my exams! WOOHOO. Today I have a little mani to show you that I wore for about the last week. I haven't worn a glitter for ages (I don't have time for the removal process), but I was really feeling like wearing one. So naturally I had to look in my Dollish Polish drawer in my helmer. I came out with 'I'll Tumble For Ya' and thought I might do a gradient inspired by the glitters like I did for some of my last few Dollish Polish posts (here, here and here). So here you go…


I'll Tumble For Ya, Dollish Polish, swatch, gradient OPI

I'll Tumble For Ya, Dollish Polish, swatch, gradient OPI
I love 'I'll Tumble For Ya' so much. There's something about white polish that is just so clean. The glitter colours in this polish are just so perfect together too. For the gradient I used Avon 'Strawberry', OPI 'No Room For the Blues' and OPI Greenwich Village'.


I used 3 coats of 'I'll Tumble For Ya'. As you can see in the bottle there are stars and bigger glitters, these didn't wanna come out and play too much and I couldn't be bothered fishing too much so I just made do with exactly what came out on my brush - I don't mind that it's slightly more subtle. The formula was really easy to work with though and really opaque too.


Head on over to Dolly's Big Cartel shop because I've just checked and this polish is in stock right now. Make sure you follow Dollish Polish on her various social media sites to keep up with updates (Facebook, Twitter and Instagram)


Hope you are all doing well and I will see you on the other side of my exams next week :D

Saturday, March 8, 2014

Blue Ombré - Featuring piCture pOlish, Color Club and OPI

HI!!!

I'm still here! Apologies for the extended hiatus, I have just had my first week of uni and it has been crazy busy, albeit pretty freaking cool! It's so great to be in a lab doing real things! Anywho, I will try and get some posts lined up in the weekend in the future so that I don't go so long with nothing.

I tried an ombré mani for the first time last week. My first thought was blue, followed very closely by HOLO! So that's just what I went with…


picture polish Cosmos, Ocean, color club over the moon, OPI DS sapphire, Ombre

picture polish Cosmos, Ocean, color club over the moon, OPI DS sapphire, Ombre
I kinda love this mani! It makes me want to do more ombré manis and also makes me wonder why I've never done one before! I used piCture pOlish 'Cosmos' and 'Ocean' on my pinky and ring fingers, then Color Club 'Over The Moon' and OPI 'DS Sapphire' on my middle and index fingers.


I won't go much into formula etc, other than to say that these polishes are all pretty great formula-wise (other than the fact the the OPI is slightly sheer and oh-so-stinky).


What are your favourite colours for ombré manis?

Tuesday, February 18, 2014

Lincoln Park After Dark - OPI

Hi everyone!

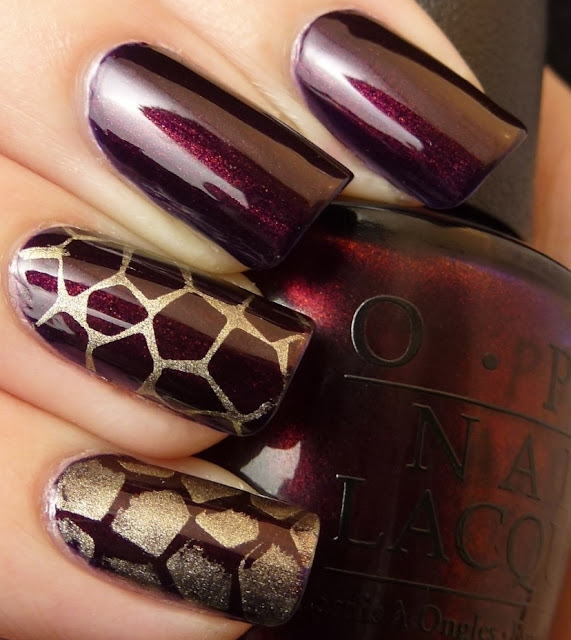
We have had a busy weekend with a quick trip home to Wellington for a very important family occasion. I'm so glad that we could go home to be with our family at this time. Anyway, these are the nails that I wore last week. This is again, one of my first polishes that I got and so it always has had a special little place in my heart - 'Lincoln Park After Dark' by OPI.


Just as last week I said I loved wearing red, there is something about wearing really dark polishes too. It took me a long time to get up enough courage to wear dark polish when I was new to nail polish, but now I absolutely love it. 'Lincoln Park After Dark' appears black in lower lighting, but is in fact a super dark purple colour, which I think just takes the edge off to remove the starkness of a pure black.


I used 2 easy coats of 'Lincoln Park After Dark' for this mani. I also used some 2mm square studs from the Born Pretty Store for my accent nail.


Thanks for popping by, and I promise life will settle down and blogging will become more regular soon!!

Tuesday, February 11, 2014

Vodka & Caviar - OPI (Jelly Sammy)

Hi all!

Life is still crazy and busy and strange, but that's for another place, so instead let's just go straight to what's currently on my nails. I haven't done a jelly sandwich in a long time and it's just what I felt like doing recently…


OPI Vodka & Caviar, CrowsToes Maxxed Out, Jelly sandwich, swatch
This is OPI 'Vodka & Caviar' which was one of my earliest polishes (before I became crazy-polish-lady). I have always had a love for red polish, I think there are few things more wonderful than perfectly manicured red nails. I've been meaning to try this polish as a jelly sammy for a long time and I'm glad I finally did. I did 2 coats of 'Vodka & Caviar' followed by 1 coat of CrowsToes 'Maxxed Out' (aka my favourite glitter EVER!) and then 1 more coat of 'Vodka & Caviar'.


Both these polishes are easy to work with. 'Vodka & Caviar' is naturally a little sheer (being a jelly), but it builds really nicely and 3 coats was more than enough for full opacity (as seen on my ring and index fingers). 'Maxxed Out' is jam-packed with glitter so it is also easy to get the amount of coverage you want from it.


I love a jelly sandwich and I don't often think to do them. What are your favourite jelly sandwich combos?

Friday, November 8, 2013

Jinx - OPI

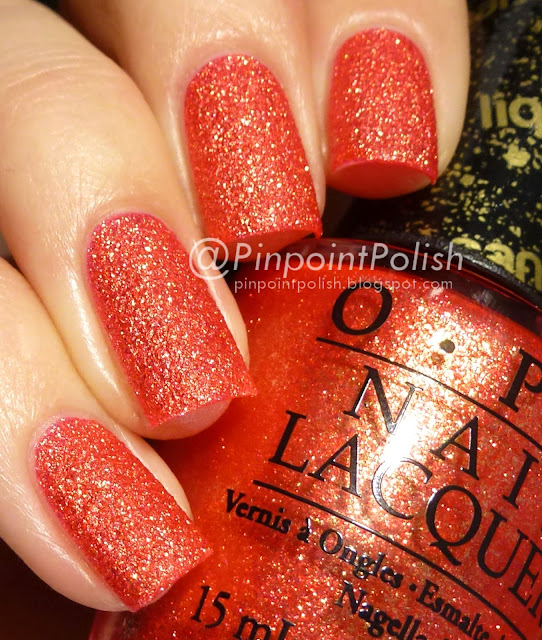
WOOOhooooo 3 exams down and one to go! Cannot wait to be free. So soon! Anyways, I have a super quick post today and it is OPI 'Jinx' from the Bond Girls Liquid Sand collection. This is the perfect exam polish. It wears like… something that stays on for a really long time. I've had this baby on since last Saturday and it still looks as good as new a week later.


OPI, Jinx, liquid sand, swatch


OPI, Jinx, liquid sand, swatch
So pretty! I know, I am so late to jump on the textured polish bandwagon. But oh-boy I want them all now. So pretty! Plus I keep just feeling my nails (I know you all do that too!).

'Jinx' was really really easy to use. I sometimes forget how much I love OPI brushes and then I use one again and it's just the right size. I used 2 coats for full opacity on my left hand, but as usual I popped another coat on my right hand to make everything even for the photos.

Which textured polishes are your favourites? I am keen to try more of the OPI Liquid Sands like this and also some Zoya's.

Sunday, August 4, 2013

Have Fun Storming The Castle - Dollish Polish (+ a Gradient)

Hi folks!

I have a little post for you today featuring another of the Dollish Polish Princess Bride polishes. Today, I have 'Have Fun Storming The Castle' to show you...


Have Fun Storming The Castle, Princess Bride, Dollish Polish, swatch, Gradient nails
I love 'Have Fun Storming The Castle', it's quite unique in my fairly extensive indie collection. I like the grey/beige milky base. Can you believe that this is my first polish with large circles in though? I decided to pair this polish with a bit of a gradient to go with the burgundy hexes that are in it. For the gradient I used OPI 'Manicurist of Seville' and 'My Boyfriend Scales Walls' with Lime Crime 'Lavendairy'.


The formula of 'Have Fun Storming The Castle' was easy to work with and this is showing 3 coats over a white base. I don't think you need a base because it actually builds up quite easily. The only issue is that the larger glitter pieces didn't come out too readily. I did have to fish for my one large circle on my index finger. This doesn't bother me, but I know it might bother some people. Overall I love the mix of colours and shapes of glitter.


At the time of writing this, 'Have Fun Storming The Castle' is still in stock on Dolly's Big Cartel shop, so hop over there and grab it for $10.

Sunday, June 2, 2013

Black & White Watermarble

Hi lovely people!

I have so so much going on with uni work at the moment so this will be a short sweet post. I did a water marble a couple of weeks back and lets just say it was not the easiest time I've had. It was a really cold night and I couldn't make any of my polishes that are usually fine work. Anyway eventually this happened...


I can't even tell you how many polishes I tried the night I did this. It looked as though some polish explosion had happened afterwards though, as there were bottles of polish EVERYWHERE! In the end I had to go back to my trusty a-england 'Camelot' and OPI 'My Boyfriend Scales Walls' and this time I added INM 'Northern Lights' to the mix. I also put a layer of 'Northern Lights' over the top of everything too to give a teeny bit more sparkle.


Overall I don't think this came out too bad. Lots of people seemed to like it, but I just knew how much trouble it was, so for that reason alone I couldn't love it too much... Anyway, hopefully next time I have a little more luck.

Wednesday, March 13, 2013

Polish Days: Vintage

It's Polish Days time again! For the first time since I started participating in Polish Days, I really struggled with the theme. This month's theme is Vintage... Hannah suggests that you could take the theme to mean using a vintage polish, or taking a decade or trend or anything really, so long as there is some connection with the past as your inspiration. Seems easy enough right... Wrong! I could not think. I often do stamping that reminds me of old-fashioned wallpaper etc, but I wanted to do something different and as I always use Polish Days as a way to make sure I do some nail art, I didn't want to just swatch a vintage polish. In the end I googled the word vintage and this is what I came up with..,


This totally reminds me of an old-fashioned day at the beach. I actually really like the way this turned out with the stripes and everything.


This was my inspiration image. As I was scrolling down through google images, I instantly fell in love with this and knew I wanted my mani to come from this.


Here are my nails pre stamping. I love the stripes. Please excuse the fact that only two of my nails are top coated! I'm not sure why I thought it was a good idea to take photos before I did the other two??

Polishes I used were OPI 'My Boyfriend Scales Walls' as the base on all nails. I did the stripes using striping tape from Born Pretty Store with OPI 'Steady As She Rose' and China Glaze 'Aquadelic'. My ring finger was stamped using BM-309 with a-england 'Galahad' and BM-09 with Essie 'School of Hard Rocks'.

Thanks Hannah for another great Polish Days! Make sure you check out what all the other lovelies have made of this theme...

Wednesday, February 6, 2013

Polish Days: Get Back To Nature

It's time for February Polish Days. I love Polish Days as it makes me do something a bit different each month. Trouble is, I always seem to go a little overboard and can't seem to ever just have one idea and a nice simple mani. This month is no different :) The theme this month is all about getting back to nature. I decided to go with the weather theme that Hannah suggested, in particular the four seasons...


I decided to use different techniques on each finger. For Autumn, on my pinkie I tried the saran wrap technique for the first time. I quite like how that turned out actually. I have to say, the seasons aren't particularly appropriate for New Zealand, but oh well (e.g. it doesn't snow in Auckland and it is certainly not Easter in spring). I used quite a few different polishes so I will just list them below...


Autumn:
• Enchanted Polish 'Mean Mr Mustard'
• Takko Lacquer 'Va Va Voom'
• a-england 'Holy Grail'
• OPI 'My Boyfriend Scales Walls'

Winter:
• KB Shimmer 'Witch Way?'
• Stamping - Konad Special White and Bundle Monster plate BM-323
• "Glequins" from Born Pretty Store

Spring:
• Lime Crime 'Lavendairy', 'Once In a Blue Mousse', 'Pastelchio' & 'Crema De Limón'
• Chi Chi 'Disco Diva'

Summer:
• OPI 'No Room For The Blues'
• Studs from Born Pretty Store


Make sure you check out all the other lovely Polish Days manis...

Tuesday, January 15, 2013

Neon Water Marble Take 2...

Hi guys!

Sorry for being slightly AWOL. We have had a busy last week in Wellington trying to spend lots of time with family before coming home. Anyway, I had another terrible time trying to marble in Wellington. There is something about that city that means I just can't make it work! After about 3 hours of trying, I managed to pull together something that looked like it worked. I had wanted to do some pastel colours, but the China Glaze neons were the only ones that I could make marble, so here we go...


Don't look too close, because it is not my best work, but considering how much went wrong I think it turned out ok. I used OPI 'My Boyfriend Scales Walls' with China Glaze 'Sun-Kissed', 'Surfin' For Boys', 'Splish Splash' and 'I'm With The Lifeguard'. On the top is a coat of Chi Chi 'Disco Diva'.

As to what went wrong, I have NO idea! I was using polishes that I knew marbled well as I have used them before but something just wasn't right. We tried everything to fix it (temperature, different water etc etc) and I have come to the conclusion that there is just some sort of curse against me marbling in Wellington :) Now I'm back home I am going to reattempt my original idea.

Wednesday, January 9, 2013

Polish Days - Something New

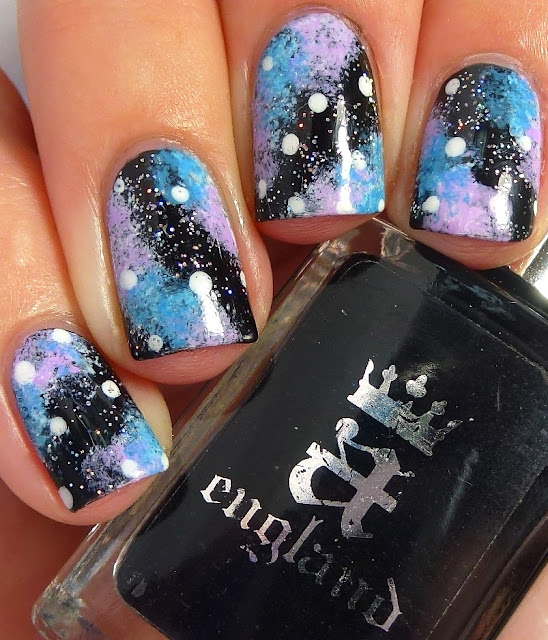
Polish Days time again! I love participating in Polish Days, because it pushes me to do something that I wouldn't necessarily get round to otherwise. So this month Hannah of Polly Polish set the theme to be 'Something New', as "January is all about new starts, resolutions and starting over". I took this as a good kick up the bum to finally try a new technique - Galaxy Nails. I had slightly limited supplies, as I did this mani in Wellington. When I go home and have more time and polish, I'd quite like to try a slightly more complex version with a different colour combination etc. For now though, I do quite like this simple galaxy mani...


Polish Days - Something New, Galaxy Nails


I got my inspiration from a lot of googling of NASA images and also from the lovely Sarah from Chalkboard Nails.

This mani was so simple and I don't know why I thought it would be so hard?! Now I want to do more like these.

For this I used a-england 'Camelot' for the base, China Glaze 'Sweet Hook' and OPI 'No Room For The Blues' for the sponging. The dots are OPI 'My Boyfriend Scales Walls' and of course, a bit of Chi Chi 'Disco Diva' on there too.

Make sure you check out everyone elses 'Something New' manis...

Sunday, January 6, 2013

Jelly Sammie with Big Hair... Big Nails - OPI

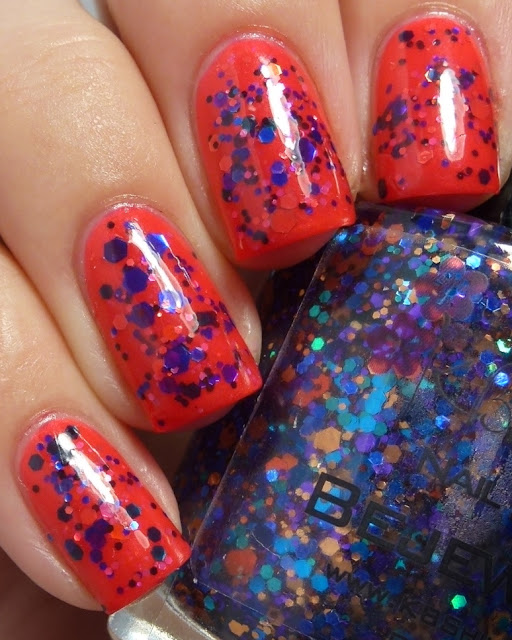
Once again I have eaten a feast of food tonight and have finally gotten home (happy and full) to some internet, so... It's jelly sammie time again! This time with something a little brighter...


Jelly sandwich, OPI Big Hair... Big Nails

Jelly sandwich, OPI Big Hair... Big Nails
This jelly sandwich doesn't translate super well to these photo, but you can get the idea at least. For this look, I used 2 coats of China Glaze 'Surfin' For Boys', followed by a coat each of KB Shimmer 'Bejeweled' and CrowsToes 'Absolum - Your Potions Master'. I finished up with 2 coats of OPI 'Big Hair... Big Nails'.


Jelly sandwich, OPI Big Hair... Big Nails
This picture is a little closer to how insanely bright it was in real life.


Overall I really liked how this turned out. It was a bit different to what I've done before but at this time of the year it felt pretty perfect. I probably could have done with an extra coat of top coat for these photos, but as I've said before a little texture never bothers me. Everything in this mani was easy to apply formula wise. I used 2 coats of 'Big Hair... Big Nails' because I love the more suspended/floating look of the glitter in a jelly sandwich.

Wednesday, November 7, 2012

Polish Days: MAN-icure


My first Polish Days! I'm very excited to have finally joined up with this awesome idea. This months theme is MAN-icure in tribute to Movember. I instantly knew what my MAN-i would have to be, as it is something that I get teased about loving, due to its manly nature (according to my friends). One of my big loves in life is Formula 1, namely Sebastian Vettel.


Formula One Nails, Polish Days
For those of you that don't know, Vettel is the current world champion, having won the championship for the last two years in a row, so he is car number 1. The 1 on my ring finger is the one on his RB8 (car) this season. The water marble is taken from the Red Bull colours (his team).


This is a quick snap of my Red Bull cap. Unfortunately I got this before Vettel won the championship the first time so it has number 5 on it. Anyway you can see the colours of the team there nicely.

The final MAN-i that you have just seen was actually attempt number two... I originally wanted the bright yellow from the nose cone of the RB8 in the water marble, but it didn't quite work as I had wanted...


Formula One Nails, Polish Days
As you can see, the colours all sort of muddied together. Much as I don't hate this, I am glad I redid the two nails. I love how the F turned out in the top one anyway.


I used a whole lot of polishes for this MAN-i...
a-england - 'Excalibur' & 'Camelot'
OPI - 'Red Lights Ahead... Where', 'I'm Not Really A Waitress', 'Yoga-Ta Get This Blue', 'No Room For The Blues', 'The 'It' Color'
Nicole by OPI - 'Listen To Your Momager'
Sally Hansen - 'White On'
Konad - Special White

If you have any questions about what I used where, please leave a comment and I'd be happy to tell you more :)

For the middle finger I used LeaLaC XL - B stamping plate and for my ring and pinky finger I used striping tape to get all the lines nice and straight.

I had lots of fun doing this MAN-i and it actually served as the perfect distraction to take my mind of the pain in my tummy while I was sick :)

If you want to sign up for the next Polish Days, hop over to Polly Polish for information.

Tuesday, October 23, 2012

Sneeze Breeze - The Hungry Asian

I am currently DROWNING in exam study so the next few posts might be a little shorter. Also I have a problem child right now, by way of my middle finger on my right hand (the one you see) that has decided to have the peeling tantrum of all time and started to grow out a bit weird. So today, I've had to chop them all! Shortest they've been in years. It feels so strange to feel my fingertip above my nail! Oh well, a bit of TLC and hopefully they'll be up and growing in no time.

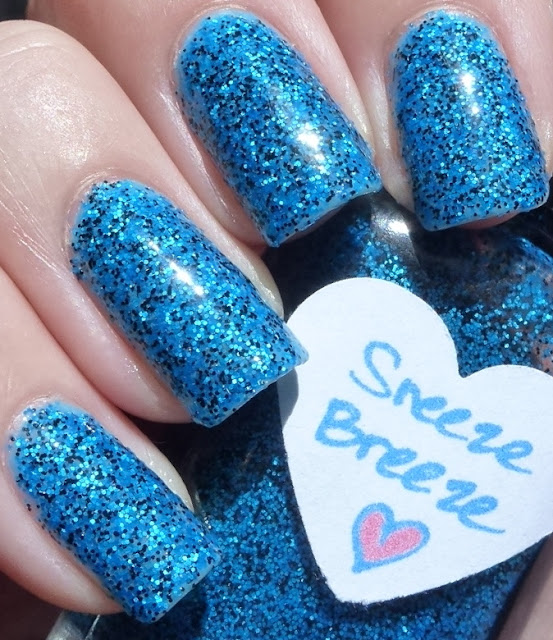
Today I have the wonderful 'Sneeze Breeze' from The Hungry Asian...


Sneeze Breeze, The Hungry Asian, swatch
'Sneeze Breeze' is a mixture of blue and black matte glitter in a clear base. So simple and yet absolutely freaking amazing!


Sneeze Breeze, The Hungry Asian, swatch

To me, 'Sneeze Breeze' is like summer in a bottle. It's so vibrant and happy looking. I love it. As you can see, it's quite dense. I used two pretty thick coats and it was fairly opaque, but I have one coat of OPI 'No Room For The Blues' (speaking of gorgeous polishes) underneath.


This also happened to be the first time I tried using PVA glue as a base coat. This is such a genius idea and I love whoever thought of it! If you want to read more about PVA glue as a base, hop on over to Lab Muffin or Pretty Purple Polish. I'm not sure who originally came up with this idea (if anyone knows, please let me know so I can put a link), but I looked at the two blogs that I've linked. Also the lovely Kirsten from Glitta Gloves gave me some handy hints on Twitter (thanks!!). Anyway, all in all, the PVA glue as a base coat thing was a HUGE success!! So easy and makes me want to wear glitter every day of my life. Granted, I don't think the wear time was as good as normal for me personally, but it just means I can effortlessly change my glitter more often :) (and when I say not as good, it still happily lasted a couple of days, so not bad at all).


For those of you who haven't seen it in action, this is what it looks like when peeled. The first hand broke up a lot, but the second hand I just ran under warm water for a minute and they peeled off so easily in one piece (going from the cuticle end always).

Wednesday, October 10, 2012

Inspired by... Jean Paul Gaultier

I have something a little different today and it's something that I quite like. We all know that I'm a little lacking in the art department and to be honest the thought of it scares the living daylights out of me still. I think a main problem of mine is that I'm not a very creative person and so I think to myself, I should do some sort of nail art today... Then I'll sit for an hour desperately trying to think up a brilliant idea, meanwhile I've thought up a million reasons why I shouldn't do it and I end up painting my nails with one plain colour... So here's what I am trying to do now - I'm trying to find inspiration from what's around me, which is where todays mani comes in.


Sitting up on my bookshelf was one of Dan's old empty Jean Paul Gaultier bottles and for once I was hit with inspiration. So I grabbed my bottle of the same summer edition for Women (I think 2006?) and got painting.


Please excuse my over-zealous top coating, will I ever find the key to not smudging stamping?
I used Color Club 'Wicked Sweet' as the blue base (over white) and Nicole 'Paparazzi Don't Preach' for the peach accent (also on my thumb). I then used the saran wrap technique to dab on the clouds using OPI 'My Boyfriend Scales Walls'. I added OPI 'Stranger Tides' to tie in the green of the kites with a tiny piece of sponge, then stamped using Konad Special Red polish. I used BM02 (I only used half of the image).


Alright, laugh it up!! I'm still getting my head around holding polish bottles and not looking terribly unco. Let's just say holding torso shaped bottles is not one of my best skills!


I love how this turned out and I think this inspiration thing is the way to go. Between The Boy and Me, we have a fair number of different editions of JPG perfume bottles and I am so much in love with every single one, so you will be seeing some more of these for sure.

Tuesday, August 14, 2012

Unfor-Greta-bly Blue - OPI & BM-305

Today I would like to show you the second polish that I got from the OPI Germany collection that has just been released. I am a sucker for blue polish, so naturally, I had to get this polish. This is 'Unfor-Greta-bly Blue'...


Unfor-Greta-bly Blue, OPI Germany collection, swatch, Bundle Monster BM305
This is a super dooper glowing blue with a super dooper amount of ultra-fine teal shimmer! Love, love, love! This is without top coat.


Unfor-Greta-bly Blue, OPI Germany collection, swatch, Bundle Monster BM305
I decided to add a bit of stamping and I somehow ended up with a mani that makes me think of super heroes. I'm so happy with this polish and this stamp! I used Bundle Monster plate BM-305.


Unfor-Greta-bly Blue, OPI Germany collection, swatch, Bundle Monster BM305
'Unfor-Greta-bly Blue' has so many facets. It can look really bright teal blue...


Unfor-Greta-bly Blue, OPI Germany collection, swatch, Bundle Monster BM305
But it can also become sort of blackened around the edges. Ahhh so deliciously pretty.


'Unfor-Greta-bly Blue' was really easy to apply. Like 'Every Month Is Oktoberfest', the first coat gives decent coverage and the second coat just makes everything come together and gives that gorgeous glow. I was worried that it was going to be really brush-strokey, but once it dried, most of that disappeared. You actually can't really see any brush-strokes in real life. BM-305 was also really fantastic. I had absolutely no problem with this at all. I used China Glaze 'Sci-Fi' as my stamping polish.

Saturday, August 11, 2012

Every Month Is Oktoberfest - OPI

I managed to get my hands on two amazing polishes from OPI's Germany collection that has just been released, so today I'll be showing you the first of them. 'Every Month Is Oktoberfest' is one that I knew I had to have the minute I saw it popping up on all my favourite blogs. Turns out it is even more beautiful than I could have imagined in real life.


Every Month Is Oktoberfest, Germany Collection, OPI, swatch, Bundle Moster Plate BM-313
This is just such a delicious vampy shade. MMMMMMMM I love it! It is infact an indigo, purpley blue base with a ridiculous (ridiculously good) amount of shimmer. I think it's all red shimmer, but it seems to shift a little bit to gold in certain lighting. The blue of the base is really obvious on the first coat, but disappears quite a lot on the second coat. Even though it's less obvious, it still gives this polish a perfect little something extra in my opinion, that hint of underlying indigo is what makes this polish jump to the top of my favourite vampy polish list.


Every Month Is Oktoberfest, Germany Collection, OPI, swatch, Bundle Moster Plate BM-313


Every Month Is Oktoberfest, Germany Collection, OPI, swatch, Bundle Moster Plate BM-313
This shimmer was so hard to capture in all its glory. These photos show a little taste of the bright red glow that this beauty has. I decided to add a little stamping and so I tried a couple more designs from my new Bundle Monster plates. Both these designs are from plate BM-313. I used Barry M 'Gold Foil' to stamp and I think the gold played well with 'Every Month Is Oktoberfest'.


Every Month Is Oktoberfest, Germany Collection, OPI, swatch, Bundle Moster Plate BM-313
You can see here that slightly gold shift. The corners of my top two fingers are showing the base colour. I'm not quite sure why this is so obvious here. It must be a slightly thinner bit of application, but I looked and looked and could not see this blue in real life! Strange.


The formula on this was also lovely. One coat gives really good coverage and the second coat just deepens everything and gives the polish that beautiful glow. 'Every Month Is Oktoberfest' is not too thick or thin and has a perfect self-levelling formula, applying like butter. I can't say enough how much I love this polish and it really has to be seen in real life to fully appreciate it. As for the plate, BM-313, no problem at all! Both images picked up and transferred really easily. I am still a bit of a newbie when it comes to stamping, but I figure practice makes perfect and maybe one day I can learn to not panic every time I attempt it - you should see me, as soon as I've picked up the image, my heart starts beating FAST and it's panic station. I have to admit I tried to do my pinky finger one and missed literally 2/3 of my nail with the first stamp!

For the Kiwi's, I got this at Life Pharmacy and there is a buy two, get one free deal at the moment. I think OPI's cost around $25 at pharmacies so they're a bit cheaper than Farmers and made even better by the special deal :)


I also want to say that I have been nominated by two lovely ladies for a Liebster Award. I received one from Nicola from Always Trust The Gene Genie and the second nomination was from GelaNails. They both do some gorgeous nail art! I am absolutely swamped at uni at the moment but I have a mid-semester break in a couple of weeks so I will try and answer the questions etc then :) Thanks again ladies!

Tuesday, August 7, 2012

Jelly Sandwich Take Two - Spank You Very Much - Dollish Polish & Care To Danse? - OPI

I did me just a little shopping over the weekend and I managed to pick up a couple of the polishes from OPI's just-released Germany collection (they are AMAZING!). I've never known NZ to get a collection so fast! I hope this is how it will always be in the future. For any Kiwi's, lots of pharmacies have a buy two, get one free deal going on at the moment. I also finally got a polish from the New York City Ballet Collection by OPI, so logically I had to do a jelly sanger ASAP right?! So here we go with my second ever jelly sandwich (how have I not done more of these mani's?)...


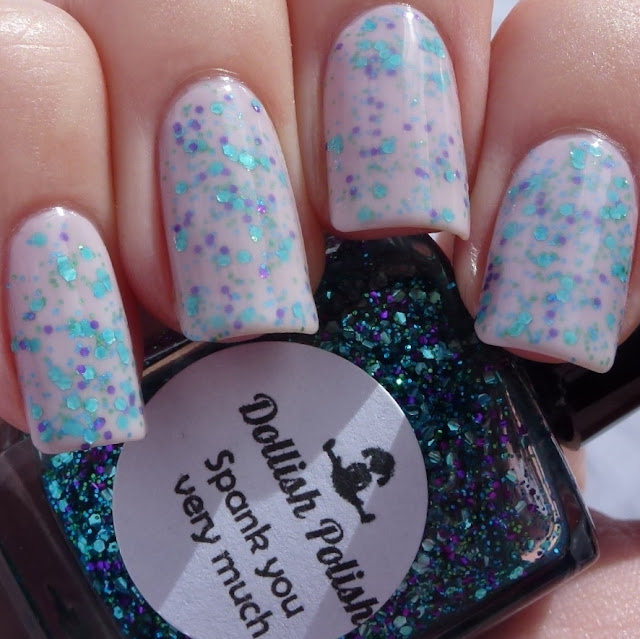
Spank You Very Much - Dollish Polish, Care To Danse? - OPI, Jelly Sandwich
I used a coat of OPI 'Steady As She Rose' to give a bit of colour under the jelly so I didn't need a billion coats (it is almost exactly the same colour). On top of that, I put one coat of OPI's 'Care To Danse?' followed by one coat of Dollish Polish 'Spank You Very Much' and finally two more coats of 'Care To Danse?' (I know, that's a lot of layers of polish).


Spank You Very Much - Dollish Polish, Care To Danse? - OPI, Jelly Sandwich
I love how this has a really soft, milky look. And I think 'Spank You Very Much' is the perfect glitter for this. This polish is so densely packed with glitter that you can have good coverage with one quick swipe. 'Care To Danse?' has a really pretty subtle pinky purple hue to it.


Spank You Very Much - Dollish Polish, Care To Danse? - OPI, Jelly Sandwich
This photo is taken under artificial, white light and the polish leans slightly more peachy pink on me. I think this is just because I am SO pasty! I love how pretty and feminine this mani is.


Spank You Very Much - Dollish Polish, Care To Danse? - OPI, Jelly Sandwich
Here's the macro so you can see just how amazing 'Spank You Very Much' is. I will have to definitely show you this one on its own at some point.


'Care To Danse?' really is very sheer, though nice and easy to work with.The thin coat of 'Steady As She Rose' just really helped to give it that little boost of colour and saved on several coats. 'Spank You Very Much' has a great formula for a glitter. As I said earlier, it is so dense so it's really easy to get plenty of glitter on your nail without having to use a really thick (or multiple) coats. I used fairly thin coats of 'Spank You Very Much' and I really like the coverage that gave.
I loved wearing this girly mani and I can't wait to try some other jelly sammies!